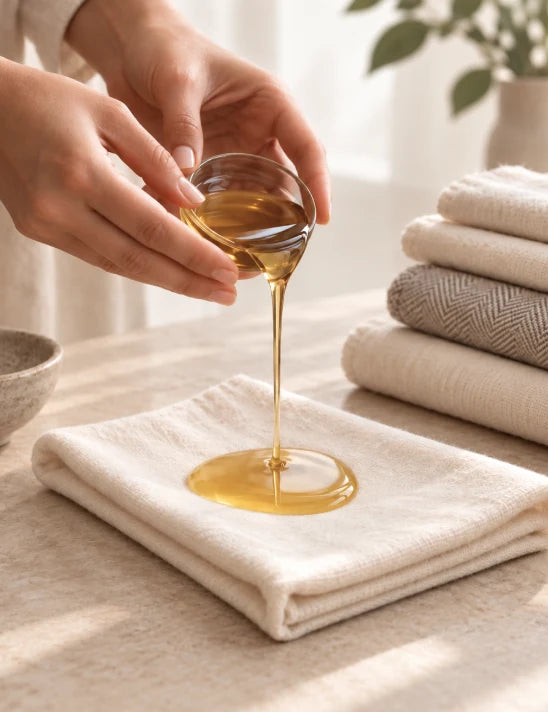
How to Apply Castor Oil for Hair, Skin, and Nails
You've got the bottle on the counter, a towel nearby, and a vague plan to “just put a little on.” That's exactly where castor oil routines go sideways. The first mistake is almost always using too much, too often, so a good result starts with a small amount, clean tools, and a clear decision about where it belongs in your routine.
A smart setup only takes a few minutes, and it saves you from weeks of greasy buildup, redness, or irritated skin. Do a 24-hour patch test on the inner forearm first, gather a clean dropper or spoolie, and decide whether you're using castor oil straight or diluted with a lighter carrier oil. If you're already using actives, plan the order before the bottle opens, because castor oil can sit on top of other products and make sensitive skin less happy.

Before You Start, Set Up Your Routine Safely
Start with the simplest rule, less oil, cleaner results. Castor oil is heavy enough that extra product doesn't make it work better, it usually just makes it harder to wash off, more likely to stain fabric, and more likely to irritate skin that's already borderline sensitive.
Patch test before you touch your face or scalp
Use the same approach you'd use for any new leave-on product. Apply a small drop to the inner forearm, then leave it alone for 24 hours. If you get redness, itching, or a rash, skip facial and scalp use altogether and don't try to “push through” it.
For a quick refresher on patch testing technique, the step-by-step guide from how to patch test skincare is worth keeping open in another tab. It's a small habit that prevents the most annoying kind of skincare mistake, the one you only discover after sleep, heat, and friction have already made it worse.
Set out the right tools before the bottle opens
A clean dropper bottle, a mascara spoolie, and a small glass dish are enough for most routines. Wash your hands first, then keep the tools dry and uncontaminated. Castor oil picks up debris easily, and once it's in a jar or cap, people tend to reuse it longer than they should.
Practical rule: if you need more than a few seconds to get the bottle open and the tool ready, you're probably about to use too much.
Choose dilution based on the area, not habit
For the face and brows, keep the oil light. If your skin leans sensitive or congestion-prone, mix castor oil with a lighter partner such as jojoba or argan.
Skip castor oil over strong exfoliating products or retinoid nights. Good layering matters more than enthusiasm here. If you want the oil to feel comfortable, put it on after a plain moisturizer, not directly on top of active treatments.
Applying Castor Oil to Scalp and Hair

The hair routine is where people overdo it. Castor oil is dense, so the goal isn't to drench the scalp, it's to spread a thin film where you want slip and protection.
Start with a small amount and blend if needed
For short hair, a coin-sized amount is usually enough. For thicker or longer hair, you can go up to a teaspoon, but only if you're diluting it first. A 1:2 or 1:3 ratio with a lighter carrier oil makes the mixture easier to distribute and a lot easier to shampoo out later.
Part the hair in sections and use fingertips, not nails. Work the oil into the scalp in small lines, then massage gently so the product sits at the roots without pooling in one place. If your ends are dry, smooth the leftover oil down the lengths instead of adding another round.
Match the timing to the goal
A 20 to 30 minute treatment is enough for a pre-shampoo reset. It gives the oil time to soften the feel of dry hair without turning wash day into a cleanup job. If you want a deeper mask, overnight use can work, but only if your pillowcase and hair wrap are protected.
Don't sleep with active heat on the scalp. Heat belongs in a controlled window, not under your head all night.
Wash it out like you mean it
Use shampoo at the roots first, then work the lather through the lengths. If the hair still feels coated, a second wash is better than piling on more shampoo the first time and hoping it solves everything. Castor oil doesn't disappear with a casual rinse, and residue is usually the reason people think the oil “didn't work.”
Face, Lashes, Brows, and Nails in One Routine
This is the part where micro-dosing matters more than technique flair. The face, brows, lashes, and nails all respond better to a light hand and clean tools than to a heavy coat of oil.
Use the smallest amount that still spreads
For facial skin, begin with 1 to 2 drops total. Warm it between clean fingers, then press it into damp skin after moisturizer or as the final step if your skin is very dry. Pressing is better than rubbing because castor oil already gives you enough drag without adding friction.
If you're mixing it into a cream, think of it as a booster, not a replacement. The blend should feel smooth, not greasy. If the face still looks shiny after a minute, you used too much.
Keep lashes and brows precise
A clean spoolie or cotton swab is the right tool for brows and lashes. Apply at bedtime so there's less chance of transferring product into the eyes during the day. Brush the brows with the lightest possible coat, then wipe the spoolie before it goes back into the bottle or jar.
For lashes, keep the oil near the base of the hairs, not directly on the eye. The goal is controlled placement, not a glossy lash line. If your eyes sting, water, or feel heavy, stop and rinse.
Give nails a quick oil soak
For cuticles, pour a few drops into a small dish and massage the oil around each nail for under five minutes. You don't need a full soak unless your hands are very dry. Castor oil works best here when it softens the skin around the nail rather than sitting thickly on top of it.
Pairing Castor Oil with Actives in Your Routine
Castor oil can be useful, but it's not a neutral layer when your routine already includes strong actives. Its occlusive film can trap ingredients against the skin, which is exactly why some people get irritated when they stack it carelessly.
Keep castor oil away from the wrong combinations
If you use retinoids, AHAs, BHAs, or benzoyl peroxide, don't layer castor oil on top of them the same night. That's especially true if you're already feeling dry or flushed. A castor oil film can hold the active against the skin longer than you want, and that raises the irritation risk.
The safer rhythm is simple. Use your actives on one night, then use castor oil on a different night as an occasional occlusive treatment. If you want both in the same week, keep the active routine plain and let castor oil be the calm, boring follow-up.
Use castor oil over moisturizer, not under it
When castor oil sits over a basic moisturizer, it seals in hydration without forcing actives deeper into the skin. That order makes sense for dry or mature skin that wants more softness but doesn't want extra sting. If you're mid-peel, or if a prescription retinoid is already making your skin reactive, skip facial castor oil entirely.
The same logic is why carrier choice matters. For a more general oil strategy, the internal guide on what is a carrier oil helps frame why lighter oils behave so differently from castor oil in a layered routine.
Bottom line: if your skin is already working hard, don't ask castor oil to sit on top of an active night and do even more.
How Often to Apply and What to Do If It Goes Wrong
The biggest castor oil mistake is treating it like a daily cure-all. For most hair and skin uses, 1 to 2 times per week is a more realistic rhythm than everyday application. Lashes and brows can be done nightly if the amount is tiny and the tool stays clean.

Read the difference between irritation and overload
Greasy roots, heavy-feeling lashes, and skin that looks congested usually mean you're using too much, too often. That's not your skin “purging,” it's usually just buildup. On hair, heavy oil can make strands feel coated and limp. On skin, it can sit in the wrong places and make the face look dull instead of nourished.
Reset the routine instead of forcing it
If the scalp feels weighed down, skip one week and come back with a lighter blend. If the face feels sticky, wash with a gentle cleanser and reduce the amount next time. For a rash or strong itching, wash off immediately with a mild cleanser or shampoo, apply a cool compress, and stop use long enough to see whether the reaction settles.
A second cleanse is usually enough to remove residue. Don't scrub the skin raw trying to “fix” an oil routine that was too heavy. Castor oil should leave the area softer, not more defensive.
Keep the weekly cadence boring
Use castor oil on a schedule you can repeat without guessing. That means targeted lash or brow work at night, a hair treatment on one or two chosen days, and facial use only when the skin is calm and not overloaded with actives. The routine works when it's predictable.
Why Cold-Pressed Single-Ingredient Oil Changes Results
The bottle matters as much as the method. A cold-pressed, unrefined, single-ingredient oil behaves differently from a highly processed blend because it has not been stripped down or padded out with extras that can change how it feels on skin and hair. If your goal is a clean routine, that difference shows up quickly in texture, scent, and how easily you can trace a reaction. For a deeper look at why processing matters, see our guide on what is cold-pressed oil.
What to look for on the label
A short ingredient list matters. One ingredient gives you fewer variables when your skin reacts, and that matters a lot if you are already sensitive to fragrance or fillers. Dark glass helps protect the oil from light exposure, and clear sourcing information is a good sign that the brand knows where its raw material comes from.
I also pay attention to whether a brand says cold-pressed and unrefined plainly, without burying the processing details. Cold-pressed oils are usually preferred for routines like this because the process is gentler, and hexane-extracted products can feel different enough that the experience is no longer comparable. That difference is easiest to notice when you are trying to keep a routine simple and repeatable.
The right product for a basic rotation is a castor oil that stays close to the raw ingredient itself, because that makes testing easier and reactions easier to read. That does not replace technique, but it does make technique more predictable.
Quality changes the cleanup too
A clean oil tends to spread more evenly, so you use less of it. That is the hidden benefit many people miss. When the formula is simple and the bottle is well sealed, you are not fighting mystery residue, artificial scent, or a texture that makes you overapply just to get coverage.
You also spend less time undoing the mess. A heavier, more altered oil can cling in places you did not mean to treat, which turns a careful routine into cleanup work. A simpler oil gives you a cleaner read on how much your skin or hair needs.
Good application starts with a bottle you trust enough to use sparingly.
Your First Two Weeks, Answered
Use the first two weeks to learn how your skin and hair respond, not to chase fast results. Start with one hair treatment in week one, one face night in week two, and a tiny nightly brow or lash pass only if the patch test stayed calm. Nails can fit into either week as a quick cuticle massage on a day you are already washing your hands and cleaning tools.
A simple starter schedule works like this:
- Day 1: Patch test on the inner forearm and leave it alone for 24 hours.
- Day 2 or 3: If the test is calm, do a small scalp or hair treatment with diluted oil.
- Day 4: Pause and watch for heaviness, itching, or residue.
- Day 5: Try a facial micro-dose, but only on clean, damp skin and not on an active-night routine.
- Day 6: Use a clean spoolie for brows or lashes at bedtime.
- Day 7: Rest.
- Week 2: Repeat only the step that felt easiest to tolerate, then add nails if everything still feels comfortable.
Pregnancy questions come up a lot. Topical use is generally fine, but oral use is not something to experiment with casually, especially because clinical references document oral dosing and medical effects. If you are pregnant or breastfeeding, ask a clinician before making castor oil a regular part of your routine.
Expiration matters too. Castor oil does have a shelf life, and once opened it is typically used within 1 to 2 years. Cool storage can help preserve it, but refrigeration is not required. If it smells off, looks cloudy in a way that is unusual for the bottle, or feels different on skin, replace it.
Start slowly, keep the dose tiny, and let the bottle earn a permanent place in your routine. If you want simple, cold-pressed oils and straightforward ingredient guidance in one place, visit our castor oil page and choose the bottle that fits the routine you will keep.