Master Scalp Exfoliation At Home: Healthier Hair Awaits
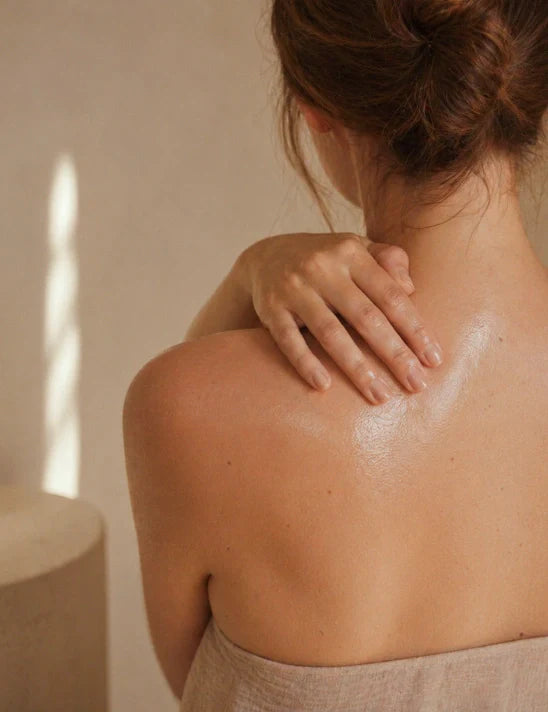
We pour so much time and effort into styling our hair, but true hair health starts somewhere much deeper: the scalp. Think of scalp exfoliation at home as a vital ritual—a reset button that clears away the buildup, excess oil, and dead skin that can stand in the way of your hair’s potential. It’s essential skincare, but for your scalp, creating the clean foundation every strand needs to flourish.
Why a Healthy Scalp Is the Foundation for Great Hair
Most of us wouldn’t dream of skipping our facial skincare routine, yet the skin on our scalp often gets completely ignored. This is a huge missed opportunity, because the health of your scalp directly influences the shine, strength, and growth of your hair. When your scalp is out of balance, it simply can’t be the optimal environment for hair to thrive.
It’s like trying to grow a garden in soil that’s compacted and nutrient-poor. It just won’t work. Your scalp is the "soil" for your hair.
Your scalp sheds dead skin cells on its own, but things like product residue, pollution, and natural oils can disrupt this cycle. Exfoliation helps your scalp get back to a state of healthy balance.
The Problem with Buildup
Day after day, your scalp collects an invisible layer of debris that, if left unchecked, can lead to frustration. This buildup is usually a mix of:
- Dead Skin Cells: Just like the skin on your face, your scalp is constantly renewing itself. Without a little help, old cells can accumulate, leading to dullness and flakes.
- Sebum (Natural Oils): While sebum is essential for moisture, too much of it can create a greasy film that clogs pores when mixed with dirt and dead skin.
- Product Residue: Your favorite dry shampoos, hairsprays, and styling creams don’t always rinse out completely. Over time, this residue weighs hair down and can suffocate the follicles.
This congestion is a primary culprit behind common issues like itchiness, flakiness, excessive oiliness, and even slowed hair growth. Scalp exfoliation works by gently lifting this debris away, either physically or with clarifying ingredients.
The result is a clean, breathable scalp where follicles are free from obstruction and can grow stronger, healthier hair. It’s no wonder this practice is becoming more mainstream—the global scalp scrub market is expected to grow from USD 15.1 billion in 2025 to USD 21.9 billion by 2035 as more people embrace simple, effective at-home treatments.
Unlock Your Hair's Full Potential
Regularly clarifying your scalp isn't just about damage control; it’s about proactively improving your hair's look and feel. When you remove that layer of buildup, your hair can grow from a clean slate, giving you better volume at the roots and a natural, healthy shine.
The gentle massage involved in exfoliation also improves circulation, which is crucial for delivering nutrients to the follicles. If encouraging growth is one of your goals, combining exfoliation with nourishing oils can be a game-changer. For example, you can learn more about how rosemary oil benefits hair and scalp health in our detailed guide.
Ultimately, a healthy scalp isn’t just about avoiding problems—it’s about creating the ideal conditions for your best hair ever.
Find Your Scalp Type and Its Exfoliation Match
Using the wrong method for scalp exfoliation at home is a lot like using a harsh facial scrub on dry, sensitive skin—it often creates more problems than it solves. Before you grab a scrub or an oil, the first step is to get clear on what your scalp is trying to tell you.
Let’s move beyond the guesswork. Does your hair get greasy less than 24 hours after a wash? That’s a classic sign of an oily scalp. For you, exfoliation can be a game-changer, helping to manage that excess oil and keep your hair follicles from getting clogged.
Or maybe your scalp feels tight, itchy, and you’re seeing small, dry white flakes on your shoulders. You’re likely dealing with a dry scalp. The right kind of gentle exfoliation will lift away that dead skin, finally allowing your hydrating oils and conditioners to penetrate and bring relief.
This simple chart can help you connect those common hair frustrations to what’s really going on at the root.

As you can see, issues like dullness, itchiness, or slow growth often trace right back to the scalp's health, making a targeted approach so important.
Physical vs. Chemical Exfoliation Explained
Once you know your scalp’s needs, you can choose your method. Scalp exfoliation really boils down to two main types: physical and chemical.
-
Physical Exfoliants: These use fine, gentle particles—like sugar or ground oat flour—to manually buff away dead skin cells and product buildup. Think of it as a satisfying deep clean, especially for oily or congested scalps.
-
Chemical Exfoliants: This sounds much more intense than it is! These products use gentle acids (AHAs/BHAs) or plant-based enzymes to dissolve the "glue" holding dead skin cells together, allowing them to rinse away without any scrubbing.
For anyone with a sensitive or easily irritated scalp, chemical exfoliation is almost always the safer bet. It cleanses deeply without the friction that can cause redness or discomfort. A pre-shampoo oil treatment is a perfect example of gentle, effective chemical exfoliation you can do at home.
Which Scalp Exfoliation Method Is Right for You?
This quick comparison can help you choose the best path forward based on your scalp's unique needs and concerns.
| Scalp Concern | Best Exfoliation Type | Why It Works |
|---|---|---|
| Oily scalp, heavy product buildup | Physical | The manual scrubbing action effectively breaks up and removes stubborn grease and residue from the scalp's surface. |
| Dryness, small flakes, tightness | Chemical | It gently dissolves dead skin without abrasive friction, preventing further irritation and allowing moisture to absorb better. |
| Sensitive scalp, prone to redness | Chemical | This friction-free method cleanses without causing irritation, making it ideal for reactive or delicate skin. |
| Combination scalp (oily & dry) | Both (Alternating) | You can use a physical scrub one week for oily areas and a chemical treatment the next to gently address dry patches. |
| Dandruff (larger, oily flakes) | Chemical (with Salicylic Acid) | Salicylic acid (a BHA) can penetrate oil to exfoliate inside the pore and dissolve the specific buildup linked to dandruff. |
Ultimately, choosing correctly ensures your efforts lead to what we’re all after: a balanced, healthy foundation for beautiful hair.
How to Create and Use a DIY Physical Scalp Scrub
There’s something incredibly satisfying about creating your own beauty treatments. A DIY physical scrub puts you in complete control, blending fresh kitchen ingredients into a ritual that feels both simple and luxurious. This method uses gentle, grainy particles to manually lift away buildup, leaving your scalp feeling balanced and deeply clean.
And the best part? It's far easier than it sounds. You likely already have everything you need to get started.

DIY Scrub Recipes for Every Scalp
Here are two of our favorite recipes, designed to be customized for your scalp’s specific needs. Our Clarifying Sugar & Rosemary Scrub is a perfect reset for normal to oily scalps, while the Soothing Oat & Jojoba Scrub offers a gentler touch for dry or sensitive skin.
1. Clarifying Sugar & Rosemary Scrub (For Oily or Normal Scalps)
This scrub is built to cut through excess oil and invigorate the scalp. Brown sugar offers a soft but effective grit that dissolves easily, while rosemary oil clarifies and promotes circulation.
-
Ingredients:
- 2 tablespoons of brown sugar
- 1 tablespoon of Ella & Eden Jojoba Oil (or another carrier like coconut)
- 3-4 drops of Ella & Eden Rosemary Essential Oil
-
To Make: In a small bowl, combine the brown sugar and jojoba oil. Once mixed, add the drops of rosemary oil and stir until you have a consistent, grainy paste.
2. Soothing Oat & Jojoba Scrub (For Dry or Sensitive Scalps)
If your scalp is prone to irritation, this calming blend is for you. Finely ground oatmeal gently lifts away flakes without feeling abrasive, and jojoba oil delivers soothing, skin-similar hydration.
-
Ingredients:
- 2 tablespoons of finely ground oatmeal (a coffee grinder or blender works perfectly)
- 2 tablespoons of Ella & Eden Jojoba Oil
- 1 teaspoon of honey (a natural humectant that draws in moisture)
-
To Make: Mix the ground oatmeal and jojoba oil in a bowl. Drizzle in the honey and stir until everything is well-combined. The final texture should feel smooth with a very mild graininess.
Pro Tip: Always make your scrub right before you plan to use it. This ensures the ingredients are fresh and at their most effective. Avoid storing leftovers, as these natural blends can spoil quickly without preservatives.
How to Apply Your DIY Scalp Scrub Correctly
Your technique is just as important as the ingredients. Rushing the process or applying too much pressure can do more harm than good, so think of this as a mindful moment of self-care.
Start by getting your hair thoroughly wet in the shower. Gently squeeze out the excess water so it’s damp but not dripping—this keeps the scrub from dissolving too fast.
Now for the most crucial step: part your hair into several sections using clips. This gives you direct access to your scalp. If you just smooth the scrub over the top of your hair, you'll end up exfoliating your strands instead of the skin underneath.
Working one section at a time, take a small amount of the scrub onto your fingertips. Apply it directly to the scalp and begin massaging with gentle, circular motions. Always use the pads of your fingers, never your nails, which can create micro-tears and cause irritation. Give a little extra attention to areas where you tend to get oily or feel buildup.
Continue this massage for about 2-3 minutes across your entire scalp. Breathe deep and enjoy the process; it’s a wonderful way to release tension.
When you're finished, rinse your hair with warm water until you can no longer feel any grainy particles. Follow up with your usual shampoo and conditioner. You might even find you need less shampoo than normal, since the scrub has already done most of the heavy lifting.
This simple home ritual is part of a much larger wellness trend. The scalp exfoliate market is projected to grow from USD 1.78 billion in 2025 to a staggering USD 4.52 billion by 2035, largely driven by the boom in e-commerce and at-home beauty routines.
A Gentle Approach with Chemical Exfoliants and Oils
Does the thought of a physical scalp scrub sound too harsh? You’re not alone. For those with sensitive, dry, or easily irritated skin, a softer touch isn’t just a preference—it's essential.
This is where the quiet power of chemical exfoliants and pre-shampoo oil treatments comes in. They offer a beautiful way to clarify your scalp by dissolving buildup, with no abrasive scrubbing needed. This method can truly change the game if you find traditional scrubs leave your scalp feeling tight or tender.

Creating Your Pre-Wash Scalp Clarifying Treatment
Think of this as a focused scalp mask that works its magic before you even get in the shower. The beauty of this ritual lies in combining a hardworking carrier oil with a purifying essential oil. We’re creating a simple, potent blend to break down impurities and soothe the scalp at the same time.
- 1 tablespoon of Ella & Eden Organic Castor Oil: Castor oil is incredible at dissolving other oils and impurities, making it perfect for breaking down stubborn buildup. Its rich, viscous texture is the ideal base for this treatment.
- 2-3 drops of Ella & Eden Tea Tree Essential Oil: Known for its natural purifying properties, tea tree oil helps deeply cleanse the scalp and refresh follicles.
Just mix the two oils together in a small bowl. The castor oil acts as the carrier, diluting the potent tea tree oil to make it perfectly safe and gentle for your skin.
If you're curious about other nourishing oils, our guide on the benefits of argan oil for hair growth explores how different botanicals can elevate your routine.
The Application Process for Maximum Benefit
How you apply this treatment is key. Unlike a scrub, this oil blend should be applied to a dry scalp before washing. This allows the oils to work directly on buildup without water getting in the way.
Start by parting your hair into a few sections so you can see your scalp clearly. Use a dropper or just your fingertips to apply the oil mixture right onto your scalp. Pay extra attention to any areas where you feel the most buildup or notice oiliness.
Once applied, gently massage the oil into your scalp for about 3-5 minutes with the pads of your fingers. This isn't just relaxing; the massage helps loosen debris and stimulates blood flow, promoting a healthy environment for your hair to thrive.
Now, let the treatment sit and do its work for 15-20 minutes. This gives the oils enough time to penetrate and dissolve excess sebum, dead skin cells, and product residue. Try not to leave it on much longer—the goal here is clarification, not deep conditioning.
When the time is up, hop in the shower and wash your hair as you normally would. You might want to shampoo twice to make sure all the oil is rinsed out. You’ll be left with a scalp that feels incredibly clean, balanced, and refreshed—all without a single abrasive grain.
Your Post-Exfoliation Care Routine for Best Results
You’ve done the hard work of clearing away buildup and resetting your scalp. But what you do next is just as important as the exfoliation itself. Think of your scalp like freshly cleansed skin—it’s now perfectly prepped to soak up nourishment, but it’s also a little vulnerable.
The right follow-up routine is what locks in all those benefits, soothes the skin, and sets the stage for your hair to look its absolute best.
First thing’s first: make sure every last bit of your scrub or treatment oil is completely rinsed away. Reach for a gentle, sulfate-free shampoo. Sulfates can be far too harsh on a freshly exfoliated scalp, stripping away the natural oils you need to stay balanced.
Rebalance and Soothe Your Scalp
With your scalp clean, the focus shifts to calming everything down. It’s totally normal to see a little pinkness after you exfoliate, especially if you used a physical scrub. A soothing scalp toner can work wonders here.
Here’s a little pro tip I swear by: lightly spritz a calming hydrosol like Ella & Eden’s Rosewater Toner directly onto your damp scalp. Rosewater is celebrated for its anti-inflammatory magic, helping to reduce any redness while adding a touch of weightless hydration.
This is a non-negotiable step in my book. It helps restore your scalp’s natural pH and creates a calm, comfortable foundation for healthy hair. Skipping it is like washing your face and forgetting the moisturizer.
Restore Moisture with a Lightweight Oil
Now it’s time to put that good moisture back in. While your scalp and hair are still damp, reach for a lightweight, non-comedogenic oil. This simple step seals in hydration and nourishes your follicles without clogging the pores you just worked so hard to clear.
- For Fine or Oily Hair: A few drops of Ella & Eden Argan Oil are perfect. It’s incredibly light, absorbs in a flash, and delivers nutrients without weighing your hair down.
- For Dry or Coarse Hair: Jojoba oil is a beautiful choice because its structure so closely mimics your scalp’s natural sebum.
Warm just 2-3 drops of your chosen oil between your palms, then gently massage it into your scalp and work it through the ends of your hair. This brings back that softness and shine. For a deeper dive, check out our guide on how to properly moisturize natural hair.
Post-Exfoliation Styling and Long-Term Care
Finally, let your scalp breathe. For the next 24 hours, try to skip heavy styling products—think thick creams, gels, or even dry shampoo. This gives your refreshed follicles a well-deserved break and prevents immediate buildup.
This kind of mindful routine is part of a larger shift toward scalp wellness. The global scalp care market was valued at USD 14.73 billion in 2025 and is expected to grow to USD 23.81 billion by 2032. With scalp issues affecting up to 70% of adults, it’s no surprise that over 70% of brands are now prioritizing natural ingredients in their formulas. You can read more about the scalp care market’s rapid expansion on Coherent Market Insights.
Of course. Here is the rewritten section, crafted to match the human-written style of the provided examples.
Your Scalp Exfoliation Questions, Answered
Venturing into scalp exfoliation can bring up a few questions. It’s completely natural to want a little clarity before adding a new step to your self-care ritual. Let's walk through some of the most common concerns, so you can move forward with confidence and build a routine that truly works for you.
How Often Should I Exfoliate My Scalp?
When it comes to exfoliation, less is often more. The goal is to gently lift away buildup, not to strip your scalp of its natural, protective oils. The right frequency really comes down to your unique scalp and lifestyle.
- For Oily Scalps or Heavy Product Users: You might find that exfoliating once a week is perfect for cutting through excess sebum and dissolving stubborn residue.
- For Normal or Combination Scalps: Sticking to a rhythm of once every 7-10 days is usually enough to keep your scalp feeling fresh, balanced, and clear.
- For Dry or Sensitive Scalps: Be extra gentle here. Exfoliating just once or twice a month with a very mild method is all you need to lift away flakes without triggering irritation.
The best advice? Listen to your scalp. If you notice any tightness, itchiness, or redness, it’s a clear signal to pull back and give your skin a rest.
What Should I Do If My Scalp Feels Irritated Afterward?
First, take a deep breath. A little temporary pinkness can be normal after stimulating the skin, but true irritation is your scalp’s way of asking for a gentler approach. If you feel any real discomfort, pause all exfoliation for at least a week or two.
The most common culprits behind irritation are exfoliating too often, scrubbing too aggressively, or using a product that's simply too harsh for your skin. Always remember to use the soft pads of your fingers, never your nails.
To soothe the area, switch to calming, gentle care. Cleanse with a mild, sulfate-free shampoo and apply a few drops of a soothing carrier oil like jojoba directly to your scalp. Once the irritation has completely subsided, you can slowly reintroduce exfoliation—perhaps with a softer method or a less frequent schedule.
Is Scalp Exfoliation Safe For Color-Treated Hair?
Absolutely, as long as you’re thoughtful about it. In fact, a gentle scalp exfoliation at home can remove dulling residue, allowing your color to appear brighter and more vibrant. It all comes down to timing and technique.
Here are the key principles for exfoliating with color-treated hair:
- Wait After Your Appointment: Always wait at least 5-7 days after a fresh color service. Your hair cuticle needs this time to fully close and lock in the new pigment. Exfoliating too soon can cause your beautiful color to fade prematurely.
- Choose a Gentle Formula: Opt for a mild chemical exfoliant or a physical scrub with ultra-fine, smooth particles, like our DIY oat scrub. It's best to avoid harsh, large-grain salt or sugar scrubs that can be too abrasive on the hair cuticle.
- Focus on the Scalp: Be deliberate with your application. Work the product directly onto your scalp, avoiding the lengths of your hair as much as possible, and always massage gently.
When done correctly, exfoliation is a wonderful way to support scalp health without compromising the color you love. It’s all about a mindful, gentle approach.
Ready to create a clean foundation for your healthiest hair? Explore the pure, multi-purpose oils from Ella & Eden and build your perfect scalp care ritual today. Discover the collection at www.ellaandeden.com and start your journey to a happier scalp.