How to Fix Damaged Hair Naturally for Strong and Shiny Strands
So, you're ready to fix your damaged hair, but you want to do it the right way—naturally. It’s all about creating a consistent, loving routine that leans on pure oils for deep conditioning, gentler cleansing methods, and a serious break from heat and harsh chemicals.
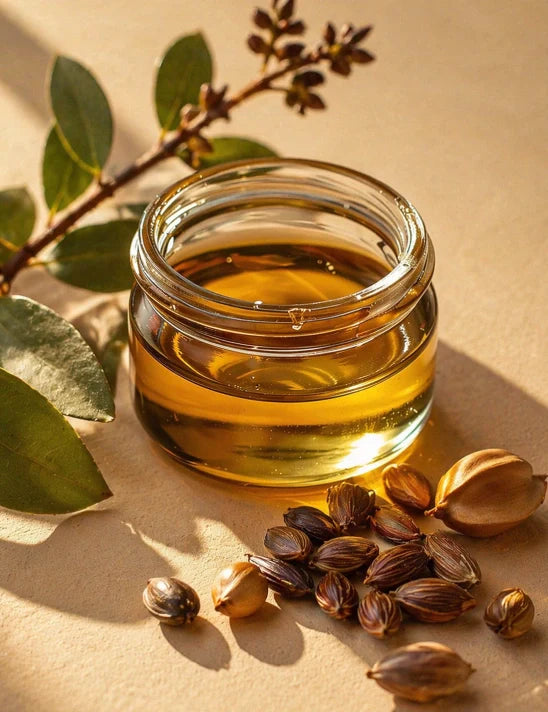
The real goal here is to nourish the hair cuticle and scalp from the inside out. Using ingredients like rich argan or castor oil helps restore moisture, bring back strength, and give you that healthy shine we’re all after. This isn't a quick fix; it's about building long-term hair health.
Your Guide to Naturally Restoring Damaged Hair

If you've been fighting a losing battle with brittle, dull, or over-processed hair, this is your starting point. It’s easy to feel stuck in a cycle of damage, whether it’s from flat irons, bleach, or just day-to-day environmental stress. You’re definitely not alone.
More and more people are ditching complex chemical cocktails and rediscovering the power of simple, single-ingredient solutions found right in nature. This isn't just another fleeting trend; it’s a genuine shift back to understanding what our hair actually needs to thrive.
In fact, the global natural hair care market is expected to hit USD 16.99 billion by 2030. That’s a huge number, and it shows just how many of us are looking for authentic, gentle alternatives. This boom is fueled by a growing awareness that synthetic chemicals often create more problems than they solve, sending people on a hunt for pure, effective remedies.
Why Choose a Natural Path to Hair Repair
Going the natural route is all about working with your body, not against it. Instead of just coating your strands with silicones to create a temporary illusion of smoothness, natural oils actually penetrate the hair shaft. They deliver the essential fatty acids and vitamins your hair is craving, which is what real repair looks like.
This approach gets to the root cause of the damage, promoting genuine, lasting health that starts at the follicle.
But let's be real: true repair is a journey. It’s not an overnight miracle. This guide is designed as an actionable program built around a few core ideas:
- Deep Nourishment: We’ll use cold-pressed oils to put back the moisture and lipids that have been stripped away.
- Gentle Handling: It’s all about adopting new habits that stop breakage and stress in their tracks.
- Scalp Health: Because we know that strong, beautiful hair can only grow from a balanced, healthy scalp.
The goal is to create a sustainable routine that not only repairs the damage you see now but also makes your hair strong enough to resist future harm. It’s about building resilience, one treatment at a time.
Before we get into the step-by-step details, let's start with a high-level look at the core strategies.
Quick Guide to Natural Hair Repair
Think of this table as your roadmap. It breaks down the key pillars of our natural hair repair plan, showing what each strategy does and the powerhouse ingredients we’ll be using to get there.
| Repair Strategy | Primary Goal | Key Natural Ingredients |
|---|---|---|
| Deep Conditioning Masks | Restore moisture and repair cuticle damage | Argan Oil, Avocado, Jojoba Oil |
| Scalp Treatments | Stimulate follicles and promote new growth | Castor Oil, Rosemary Oil, Peppermint |
| Protective Styling | Minimize mechanical stress and breakage | Silk or Satin Accessories |
| Gentle Cleansing | Cleanse without stripping natural oils | Sulfate-free shampoos, Co-washing |
With these foundational concepts in mind, you’re ready to start building a routine that will bring your hair back to life.
First, Get to Know Your Hair's Damage
 Before you can start fixing your hair, you have to play detective. Just throwing a random mask on it is like trying to navigate a new city without a map—you might get somewhere eventually, but it won't be a direct route.
Knowing your hair is "dry" or "brittle" is a decent start, but it doesn't give you the full picture. Is your hair struggling to hold moisture because the outer layer is damaged, or has it lost its internal protein structure? These are totally different issues, and they need different solutions. A couple of simple, at-home tests will give you the clarity you need to pick the right natural remedies.
Check Your Hair's Elasticity with a Simple Strand Test
Believe it or not, healthy hair has a good amount of stretch to it, all thanks to its protein core. When hair gets damaged, it loses that springiness. The strand test is my go-to for a quick, honest assessment of hair's structural health.
Find a strand of hair that has already shed (your brush or sweater is a good place to look). Hold it between your thumb and forefinger on each hand and give it a gentle pull.
- Healthy Hair: It will stretch by about one-third of its length and then bounce right back. That’s a great sign of balanced protein and moisture.
- Needs Protein: If the strand keeps stretching, feels a bit mushy or gummy, and doesn't snap back, it’s crying out for protein.
- Needs Moisture: If it snaps almost immediately with very little give, your hair is incredibly dry and brittle. It needs a serious dose of hydration.
This one little test tells you so much, guiding you toward either protein-focused treatments or deep conditioning.
Figure Out Your Hair Porosity with the Float Test
Porosity is just a fancy word for how well your hair can absorb and hold onto moisture. It all comes down to the condition of the hair cuticle, which is the protective outer layer. When the cuticle is damaged, it has gaps and holes that let moisture escape as quickly as it comes in.
Here’s how to do the float test:
- Grab a clear glass of room-temperature water.
- Take a single strand of clean, product-free hair that has shed.
- Drop it into the water and see what happens over the next couple of minutes.
What that little strand of hair does in the water tells you everything you need to know about its porosity. This is the key to picking oils and treatments that will actually penetrate your hair, not just coat the surface.
Here's what to look for:
| Test Result | Porosity Level | What It Means for Your Hair |
|---|---|---|
| The strand floats on top | Low Porosity | Your cuticle is tightly sealed. It’s hard to get moisture in, but once it's there, it stays. |
| The strand sinks slowly | Normal Porosity | You've got a healthy, balanced cuticle that lets moisture in and holds it just right. |
| The strand sinks fast | High Porosity | Your cuticle is wide open. It soaks up moisture like a sponge but loses it just as quickly. |
If you have high-porosity hair, it’s a clear sign of cuticle damage. Your hair feels constantly dry and frizzy because it just can't hold onto hydration. This is why sealing oils and rich, intensive masks will be your best friends on this repair journey. Now that you have this insight, you can build a plan that truly works.
Building Your Natural Hair Repair Toolkit
Once you've got a handle on your hair’s unique damage profile, it's time to assemble your repair kit. This isn't about buying a dozen different products. It's about hand-picking a few powerful, pure ingredients that get right to the heart of your hair's problems.
Think of these cold-pressed oils as concentrated nourishment, each with a special talent for bringing your hair back from the brink.
It's no secret that people are paying more attention to what's in their products. In fact, the natural hair care market is growing at a 9.4% CAGR as more of us ditch harsh chemicals like sulfates and parabens. We're looking for transparent labels and real ingredients. This shift is huge because it proves what many of us have known all along: pure oils and botanicals deliver amazing results without the hidden costs of synthetics. You can read more about this growing trend toward natural ingredients on freeyourself.com.
Knowing this empowers you to build a toolkit that feels right and, more importantly, actually works.
The Core Four: Your Go-To Natural Oils for Hair Repair
While the world of natural oils is vast, four stand out as absolute must-haves for anyone serious about repairing damaged hair. Each one brings something different to the table, from sealing in precious moisture to waking up dormant hair follicles.
-
Organic Castor Oil: This isn't your average lightweight oil. It's thick, rich, and packed with ricinoleic acid, a fatty acid celebrated for its ability to boost circulation. When you massage it into your scalp, you're helping nourish follicles right at the source, building a stronger foundation for new growth. It’s also an incredible sealant, locking moisture into the hair shaft to stop breakage in its tracks.
-
Argan Oil: Often called "liquid gold," and for good reason. Argan oil is a champion of deep moisturization. Its molecular structure is small enough to actually penetrate the hair cuticle, delivering a potent dose of Vitamin E, antioxidants, and essential fatty acids. This is what restores elasticity and shine to hair that feels fried and lifeless from heat or color treatments.
-
Jojoba Oil: The magic of jojoba oil lies in its unique similarity to our scalp's natural oils (sebum). Because our skin recognizes it, it absorbs beautifully without any greasy residue. This makes it perfect for soothing a dry, flaky scalp or hydrating strands without weighing them down—a game-changer for those with fine hair.
-
Rosemary Oil: Now, this one's a bit different. Rosemary oil is a powerful essential oil, not a carrier oil, and it’s prized for its stimulating properties. Research has shown it can significantly improve scalp circulation, which is critical for getting nutrients to your hair follicles. Just a few drops mixed into your castor or jojoba oil can supercharge your scalp treatment.
The real magic happens when you realize these oils aren’t just sitting on top of your hair. They're delivering essential fatty acids, vitamins, and antioxidants deep into the hair shaft and scalp to fix the problem from the inside out.
Choosing the Right Oil for Your Hair Damage
So, how do you pick the right one? Go back to your self-assessment. If your strand test revealed hair that snapped instantly, you need to prioritize moisture-rich oils. If your scalp feels tight and you're seeing more hair in your brush, a stimulating scalp treatment should be your first move.
To help you decide, here’s a quick guide to matching the right oil to your specific hair issue. For a deeper dive, especially if dryness is your main enemy, check out this in-depth guide to the beauty of Argan Oil.
This little cheat sheet will help you pick the perfect oil to tackle whatever your hair is throwing at you.
Choosing the Right Oil for Your Hair Damage
| Natural Oil | Best For | Key Benefit | Hair Type |
|---|---|---|---|
| Argan Oil | Dry, brittle, frizzy hair from heat or color damage | Deep moisturization, shine restoration, and improved elasticity. | All types, especially thick, coarse, or high-porosity hair. |
| Jojoba Oil | Dry scalp, fine hair, or low-porosity hair | Balances scalp sebum, provides lightweight hydration, and soothes irritation. | Fine, oily, or low-porosity hair that gets weighed down easily. |
| Castor Oil | Thinning, weak hair, and severe breakage | Strengthens follicles, reduces hair loss, and seals the hair cuticle to prevent moisture loss. | All hair types, but use sparingly on fine hair as a scalp treatment. |
| Rosemary Oil | Promoting hair growth and improving scalp health | Stimulates scalp circulation to deliver more nutrients to hair follicles. | All types, but must be diluted in a carrier oil before use. |
Remember, you don't need all of them at once. Start with the one that targets your most pressing concern.
With these powerhouse oils in hand, you're officially equipped to start the hands-on work of repairing your hair. The next step is turning these ingredients into a weekly ritual that will deeply nourish both your hair and scalp.
Your Weekly Ritual for Deep Hair Repair
Having the right oils in your toolkit is one thing, but consistency is where the real magic happens. If you’re serious about fixing damaged hair naturally, you need a dedicated weekly ritual that floods your strands and scalp with deep nourishment.
This isn’t about a quick, five-minute conditioner in the shower. It's about setting aside time to give your hair the intensive care it’s been craving. Think of this weekly session as a total reset. It replenishes lost moisture and lipids, reinforces the hair cuticle against future damage, and stimulates the scalp to promote healthier growth right from the source.
Honestly, this weekly ritual is your most powerful tool for seeing and feeling a real difference.
Crafting Your Custom DIY Hair Masks
One of the best things about using pure, single-ingredient oils is how easy it is to create a treatment for your hair's exact needs. Forget those one-size-fits-all masks from the store. Based on the damage assessment you did earlier, you can whip up a potent, targeted remedy in just a few minutes.
Here are a couple of my go-to recipes to get you started.
This visual guide breaks down the simple process of choosing, mixing, and applying your oils to create the perfect treatment.

The key takeaway? An effective natural hair routine is all about personalization and proper application.
1. The "Strength & Growth" Booster Mask
This mask is a powerhouse for anyone dealing with weak, thinning hair or frustrating breakage. It combines the follicle-stimulating properties of Castor and Rosemary to create an environment where your hair can thrive.
- Ingredients: 2 tablespoons of Organic Castor Oil and 4-5 drops of Rosemary Essential Oil.
- Why it Works: Castor oil's rich consistency coats the hair shaft, sealing the cuticle to lock in moisture and drastically reduce breakage. At the same time, rosemary oil gets to work on the scalp, boosting circulation to make sure your follicles are getting all the nutrients they need. For a deeper dive, check out this guide to castor oil's simple but powerful properties.
2. The "Moisture Lock" Quenching Mask
If your hair feels like straw and snaps at the slightest touch, this is the one for you. It’s all about deep hydration and restoring elasticity, using Argan and Jojoba oils to breathe life back into dry, brittle strands.
- Ingredients: 1 tablespoon of Argan Oil and 1 tablespoon of Jojoba Oil.
- Why it Works: Argan oil is brilliant because it actually penetrates the hair shaft for intense moisture, while Jojoba oil’s structure is incredibly similar to your scalp’s natural sebum. This means it provides balanced hydration without ever feeling greasy or heavy. The combination leaves hair feeling soft, flexible, and so much less frizzy.
The Art of Application for Maximum Benefit
How you apply the mask is just as important as what's in it. If you just slap it on and rinse it out, you’ll only get superficial results. Follow these steps to make sure every single strand gets the nourishment it deserves.
- Start with Dry Hair: Always apply oil to dry hair. This allows for much better absorption since there's no water acting as a barrier on the hair shaft.
- Gently Warm the Oil: Place your bowl of oil into a larger bowl of hot water for a few minutes. Warm oil helps open the hair cuticle just enough to allow for deeper penetration.
- Focus on Mid-Lengths and Ends: This is where hair is oldest and most damaged, so it needs the most love. Really saturate these areas first before working your way up.
- Massage Your Scalp: If you're using a growth-focused blend (like the castor and rosemary one), use your fingertips to gently massage the oil into your scalp for a good 3-5 minutes. This isn't just relaxing—it stimulates blood flow and helps the oils do their job.
- Wrap It Up: Once your hair is coated, pop on a shower cap or wrap it in a warm towel. The trapped heat creates a mini-sauna effect, helping the oils penetrate even more deeply.
Leave the mask on for at least 30 minutes. For severely damaged hair, I highly recommend leaving it on for a few hours or even overnight. It can be a total game-changer.
How to Wash It Out (Without Stripping Your Hair)
After all that effort, the last thing you want is to strip away all the good stuff with a harsh shampoo. Washing oil out of your hair requires a slightly different approach than your usual wash day.
- Apply Shampoo Before Water: This is the most important tip! Before getting in the shower, work a gentle, sulfate-free shampoo directly into your oiled hair. The shampoo will grab onto the oil, allowing it to rinse away cleanly.
- Lather and Rinse: Now add a little bit of water and work the shampoo into a good lather. Rinse everything out thoroughly with lukewarm—not hot—water.
- Condition if Needed: You might be surprised at how soft and hydrated your hair feels. Often, you'll only need a tiny bit of conditioner on the very ends, if at all.
Making this deep conditioning session a non-negotiable part of your weekly routine is the secret to truly reversing damage. Stick with it, and you'll soon notice your hair becoming stronger, shinier, and so much easier to manage.
Daily Habits to Prevent Future Damage
While weekly deep conditioning treatments are your go-to for intensive repair, it’s the small things you do every day that really build a foundation for healthy hair. Think of it this way: preventing new damage is just as important as fixing what’s already there.
The good news is you don’t need a complicated new routine. It’s all about making smarter, kinder choices that shield your hair from the daily wear and tear that leads to split ends and brittleness. These simple swaps add up, creating resilient hair that can finally grow long and strong.
Rethink Your Wash Day Routine
Let's be honest, how you wash your hair can either be a nourishing ritual or a major source of damage. So many shampoos are loaded with harsh sulfates that strip your scalp's natural oils, leaving your hair feeling squeaky clean but also incredibly dry and vulnerable.
A gentler approach is a game-changer. Try cutting back on how often you shampoo; washing just two to three times a week is plenty for most hair types. This gives your scalp’s natural oils a chance to do their job and moisturize your strands from the inside out.
You could also give co-washing a try, which is simply washing your hair with conditioner instead of shampoo. It’s an incredibly gentle cleansing method and a lifesaver for anyone with very dry, curly, or coarse hair who wants to get clean without sacrificing moisture.
Master the Art of Gentle Conditioning
Technique really matters when it comes to conditioning. Before you even apply it, gently squeeze the excess water out of your hair. This simple step prevents the conditioner from getting diluted and helps it soak in properly.
Focus the product on the mid-lengths and ends—this is the oldest, most fragile part of your hair and it needs the most love. Piling conditioner on your roots can just weigh your hair down and cause buildup.
And for the final touch? Always rinse with cool water. This isn't an old wives' tale; it genuinely helps seal the hair cuticle, which locks in all that moisture, tames frizz, and gives your hair a beautiful, healthy shine.
Stop Damage After the Shower
Hair is at its absolute weakest when it's wet, so your post-shower habits can make or break your progress. Vigorously rubbing your head with a rough cotton towel is probably the fastest way to create frizz and snap your delicate strands.
Instead, let's make a few impactful swaps.
- Switch to a Microfiber Towel or T-shirt: These materials are far softer and will absorb water without roughing up your hair’s cuticle. Just gently squeeze or blot your hair instead of rubbing.
- Use a Wide-Tooth Comb: Never, ever use a brush on wet hair. A wide-tooth comb is your best friend here, as it can glide through tangles without pulling or snapping your fragile strands. Always start from the ends and work your way up to the roots to minimize breakage.
The goal is to minimize friction at all costs. Every gentle choice you make, from your towel to your comb, helps preserve the integrity of the hair cuticle and prevents the kind of mechanical damage that takes months to repair.
Protect Your Hair While You Sleep
We spend about a third of our lives in bed, so what your hair is up against all night definitely matters. Standard cotton pillowcases might feel soft, but they create a surprising amount of friction, leading to tangles and breakage while you toss and turn.
The fix is surprisingly easy: switch to a silk or satin pillowcase. The smooth, slick surface lets your hair glide around without getting snagged. It’s a small change that helps you wake up with smoother, less tangled hair, and it's fantastic for preserving hairstyles.
You can also protect your hair by tying it up in a loose "pineapple" (a high ponytail on top of your head) or a loose braid with a silk scrunchie. This keeps your ends tucked away and stops them from rubbing against the pillow all night.
By weaving these mindful habits into your daily life, you're not just repairing damage—you're preventing it from happening again. This is how you truly learn how to fix damaged hair naturally for good. If you're looking for more ways to support your hair's health, you might be interested in our guide on the amazing benefits of rosemary oil for hair growth.
Your Top Questions About Natural Hair Repair, Answered
Embarking on a natural hair repair journey always kicks up a few questions. It's completely normal to wonder if you’re on the right track, how long this will all take, or if it's time to bring in a professional. Let's walk through some of the most common concerns I hear, so you can feel confident about the path ahead.
Think of this as your troubleshooting guide. Having clear, honest answers helps you set realistic expectations and navigate any bumps in the road.
How Long Does It Actually Take to See Results?
This is the big one, isn't it? The honest-to-goodness answer is: patience is your best friend here. While you'll likely feel a wonderful difference in softness after your very first oil mask, true structural repair doesn't happen overnight.
For hair that's just a bit dry or lightly damaged, you could see a real shift in texture and less breakage within 4-6 weeks of consistent, weekly treatments. But if you're dealing with serious heat or chemical damage, the focus shifts to nurturing the new, healthy hair growing in while babying the fragile ends.
Real, visible change usually takes 3-6 months. That’s how long it takes for stronger, healthier hair to grow out from the scalp. Your most powerful tool in this whole process is sticking with it.
Is It Possible to Use Too Much Oil on My Hair?
Oh, absolutely. It's a classic rookie mistake, but an easy one to fix. The trick is to find that "just right" amount for your specific hair type and porosity. Drenching your hair in oil, especially if it's fine or has low porosity, can leave it looking greasy, weigh it down, and even clog your scalp's pores.
When in doubt, start with less than you think you need. You can always add more.
- For Fine Hair: Start with a dime-sized amount for your whole head.
- For Thick or Coarse Hair: A quarter-sized amount is a much better jumping-off point.
- For Scalp Treatments: Use a dropper to apply the oil directly onto your scalp, section by section. This helps you target the roots without drowning them.
If your hair feels heavy or still looks oily after a good wash, you've used too much. No big deal. Just scale it back next time until you find that sweet spot where your hair feels nourished, not greasy.
When Is It Time to See a Professional?
At-home remedies are fantastic for tackling most common hair issues, but they can't solve everything. There are definitely times when you need the expertise of a trichologist (a hair and scalp specialist), a dermatologist, or a trusted stylist.
It's time to book an appointment if you're experiencing any of these:
- Sudden or severe hair loss: If you're seeing bald patches or a dramatic uptick in shedding, it could point to an underlying health issue that needs a doctor's attention.
- Ongoing scalp problems: Things like extreme dandruff, sores, relentless itching, or painful inflammation are more than just dryness. They need a proper diagnosis.
- Major chemical damage: Has a chemical service left your hair feeling mushy, "gummy," or fried to a crisp? A professional can assess the situation honestly. They might recommend a significant cut to remove the hair that simply can't be saved, giving you a healthy foundation to rebuild from.
Knowing the difference between what you can handle at home and when you need to call for backup is a huge part of repairing your hair safely and effectively.
At Ella & Eden, we believe in the power of pure, single-ingredient oils to restore your hair's natural vitality. Our certified organic, cold-pressed oils are crafted to deliver the nourishment your hair needs to repair and thrive. Discover our collection and start your journey to healthier hair today.