How to Moisturize Natural Hair for Lasting Hydration
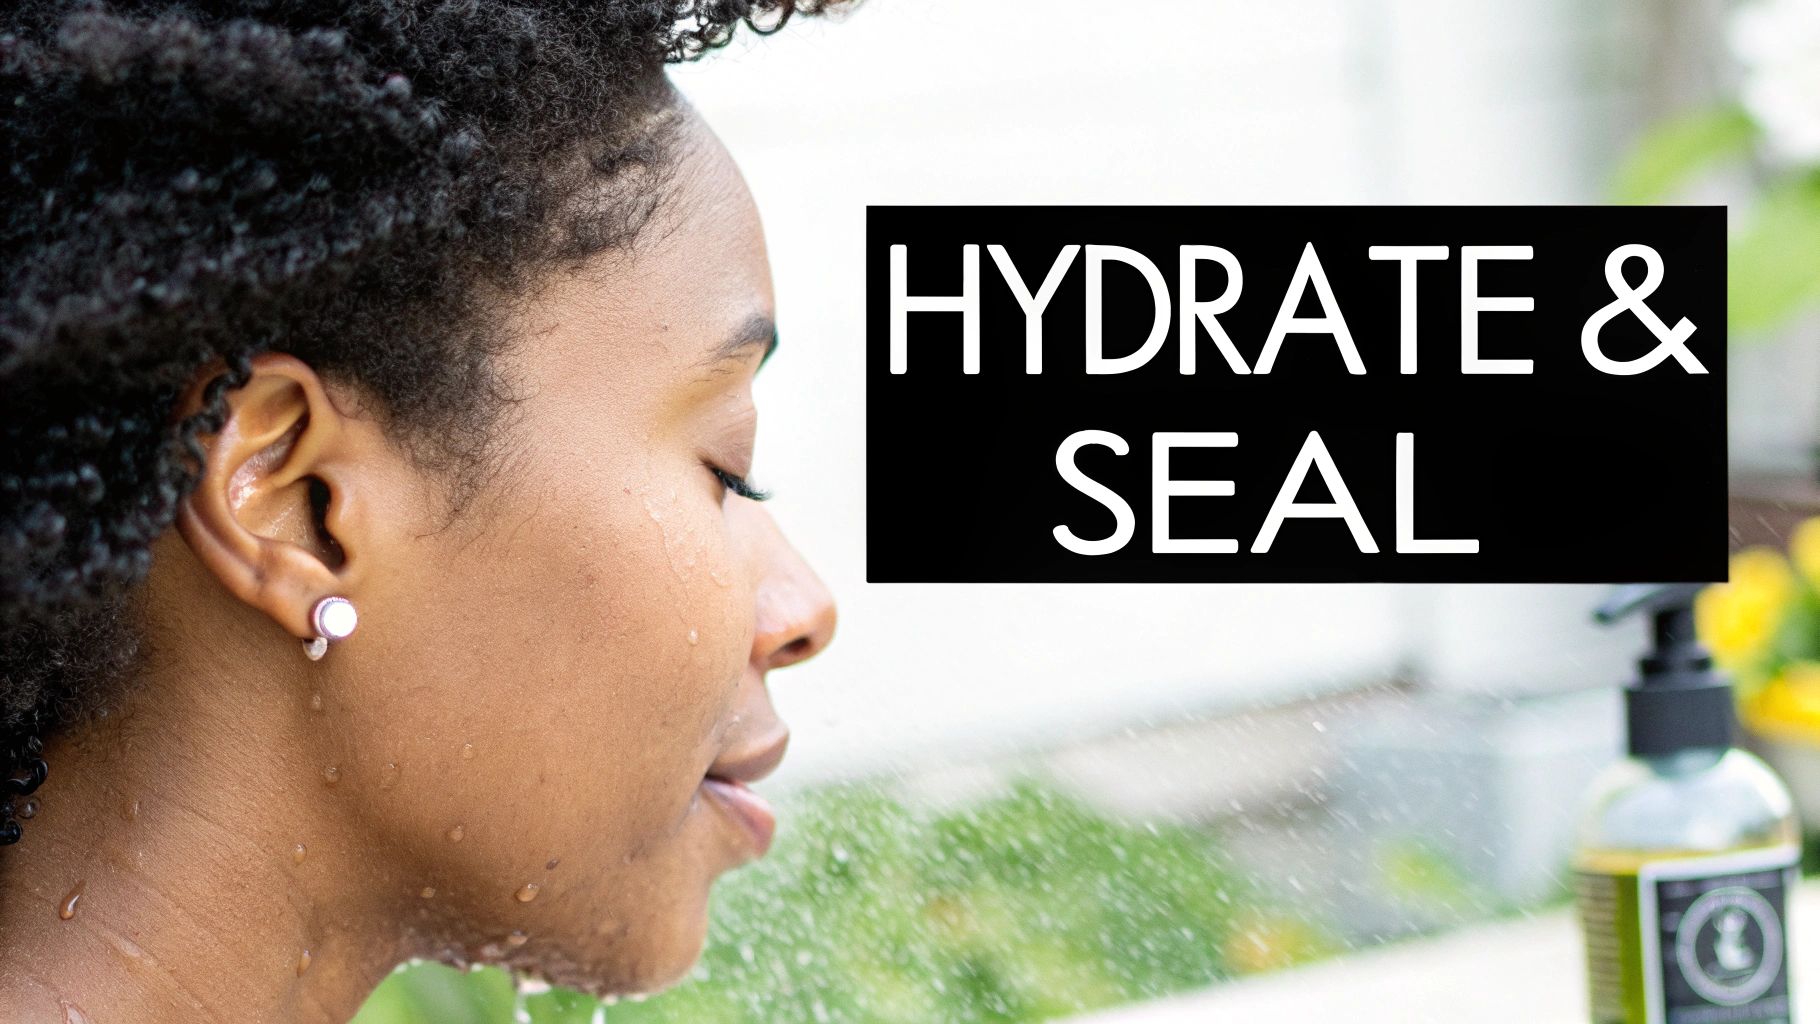
If you really want to get your natural hair moisturized, and keep it that way, you need to master a simple but non-negotiable technique: hydrate first, then seal it all in. Think of it as a two-step dance: you introduce water, and then you lock the door behind it with an oil or cream. This is the absolute key to fighting off dryness and getting that soft, elastic feel we're all after.
The Foundation of Lasting Hair Hydration
Ever feel like your gorgeous coils are perpetually thirsty, no matter how many products you pile on? It’s not just you, and it’s not your fault. It's actually down to the beautiful structure of our hair. All those lovely bends and kinks make it a real challenge for the natural oils from your scalp (the sebum) to travel down the hair shaft. Your ends, in particular, get left high and dry, making them prime candidates for breakage.
This is exactly why we have to be so intentional about how we moisturize. One of the biggest mistakes I see people make is thinking that oils and butters are moisturizers. They aren't. Slathering oil on dry hair is a recipe for greasy, brittle strands, and a whole lot of frustration.
Moisture vs. Hydration: Getting to the Core
Let's clear this up once and for all. True, lasting moisture for your hair comes from one thing: water.
Think of your hair like a houseplant. You can't just rub oil on its leaves and expect it to be healthy; it needs water at its roots to thrive. It's the exact same for our hair. Oils, butters, and creams are the sealants. Their job is to form a protective layer over the hair shaft to keep all that good water from evaporating.
The Golden Rule of Natural Hair Care: You can't seal in moisture that isn't there to begin with. Hydration always comes before sealing. Always.
The Fundamental Moisturizing Process
So, how do we put this into practice? It all comes down to a simple, repeatable routine that gets your hair ready to drink up and hold onto moisture. This is the foundation for everything else.
Here’s the breakdown:
- Start with a Clean Canvas. You can’t hydrate hair that’s caked in old product. Gels, creams, and oils build up and create a barrier that blocks water from getting in. A good cleanse with a gentle, sulfate-free shampoo or a co-wash is the perfect first move.
- Apply a Water-Based Product. Now for the main event. While your hair is still damp, it’s time to apply a water-based leave-in conditioner. You could also just spritz your hair with plain water or something like an organic rose water spray, which offers a light, refreshing dose of hydration.
- Seal the Deal. Don’t wait! While the hair is still damp from your leave-in, immediately follow up with your favorite oil or cream. This crucial step closes the hair cuticle, trapping the water molecules inside. For anyone with porous hair, this is the step that changes everything.
Embracing this simple "hydrate and seal" mindset is a complete game-changer. You'll stop just coating your hair and start truly moisturizing it from the inside out. This is the bedrock of any routine that builds elasticity, kicks breakage to the curb, and lets your natural hair truly flourish.
Find Your Hair’s Porosity to Finally Master Moisture
 Before we dive into how to moisturize natural hair, we need to figure out how your specific hair works. Have you ever tried a friend's "holy grail" product, followed their routine exactly, and ended up with a frizzy, dry mess? The culprit is almost always hair porosity.
Porosity is simply your hair's ability to absorb and hold onto moisture. Picture your hair shaft like a shingled roof. How tightly those shingles (your hair cuticles) are layered determines everything. It’s the key that unlocks why some products are miracle workers for you while others just sit on top of your hair, feeling greasy.
Getting this right is the difference between hair that feels hydrated for days and hair that’s crying out for moisture by lunchtime.
The Super Simple At-Home Porosity Test
You don’t need a fancy lab or a trichologist to figure this out. All you need is a clean strand of your hair and a glass of water. Seriously, that's it.
Here’s the simple process:
- Grab a strand of hair from your brush or comb. Make sure it's clean and doesn't have any product on it, as that can skew the results.
- Fill a clear glass with room-temperature water.
- Drop the hair strand into the glass and just watch what it does for the next 2-4 minutes.
What you’re really seeing is how fast that strand soaks up water. This one little test tells you if your hair’s "shingles" are shut tight, slightly open, or wide open—ready to absorb moisture and lose it just as fast.
What Your Results Are Telling You
Okay, so what does the floating (or sinking) hair actually mean? The final resting place of your hair strand points directly to your porosity level.
- Floating on top? You have low porosity hair. Your cuticles are packed down tight, making it tough for moisture to get in.
- Floating in the middle? This is normal (or medium) porosity. Your cuticles are looser, letting moisture in easily and holding onto it pretty well. Consider yourself lucky!
- Sank like a rock? You've got high porosity hair. Your cuticles are raised, so your hair drinks up water instantly but can't hold onto it for long.
Your porosity level is your personal roadmap for choosing products. It’s the missing piece of the puzzle that explains why a heavy butter might be a dream for your hair but weighs down your friend’s curls.
How to Moisturize for Your Porosity Type
Now for the good part—turning this knowledge into action. When you work with your hair’s porosity instead of against it, everything changes.
For Low Porosity Hair
The biggest hurdle here is actually getting moisture into the hair shaft. Since your cuticles are so compact, you'll notice products often feel like they’re just sitting on top of your hair.
- Use a little heat: Gentle heat is your best friend. A steamer, a heated deep conditioning cap, or even just applying your conditioner in a steamy shower helps lift those stubborn cuticles just enough for products to penetrate.
- Think lightweight: Heavy creams and butters will just cause buildup. Your hair will be much happier with liquid-based moisturizers and lightweight oils like Argan or Ella & Eden Jojoba Oil.
For High Porosity Hair
With high porosity hair, the challenge isn't getting moisture in; it's keeping it there. Your hair is like a sponge—it soaks up everything but can dry out in a flash.
- Layering is non-negotiable: Sealing is your primary goal. Methods like the LOC (Liquid-Oil-Cream) or LCO (Liquid-Cream-Oil) were practically made for you. Layering products creates a barrier that locks hydration in.
- Bring on the heavy hitters: Your hair can handle, and frankly needs, richer products to seal the deal. Don't shy away from shea butter or thicker sealing oils like Castor Oil to trap that moisture inside the hair strand.
Building Your Routine: The LOC and LCO Methods
Alright, now that you’ve figured out your hair’s porosity, it's time for the fun part—putting that knowledge into practice. This is where we go from knowing what your hair needs to knowing how to give it. The two most trusted techniques in the natural hair world are the LOC and LCO methods.
These aren't just random letters; they're a roadmap for layering products to get moisture that actually lasts. Think of it as a recipe for your hair.
- L stands for Liquid (or Leave-in)
- O stands for Oil
- C stands for Cream
The only thing that changes between the two is the order of the oil and cream. It seems like a small tweak, but believe me, swapping those last two steps can be the difference between hair that stays soft for days and hair that feels dry by noon.
Decoding the LOC Method for High Porosity Hair
The LOC method is a classic for a good reason, and it’s a lifesaver for anyone with high porosity hair. Remember how high porosity strands have those open cuticles? They soak up water easily but lose it just as fast. The LOC method is designed to create a strong seal to stop that from happening.
Here’s how the layering works:
- Liquid: You always start with a water-based liquid on damp hair. This can be plain water from a spray bottle or a lightweight, watery leave-in conditioner. This step is all about getting that initial hydration in.
- Oil: Next up, you smooth on a layer of oil. The oil starts to form a seal over the water, but it can also penetrate the hair shaft to deliver some extra nourishment from the inside.
- Cream: The final step is a thicker, richer cream or butter. This is your lockdown layer. It creates a heavy-duty barrier that traps both the water and the oil, preventing them from escaping through those wide-open cuticles.
For high porosity hair, this sequence is everything. That final cream acts like a bouncer at the door, making sure the moisture you just put in stays put for a whole lot longer.
Why the LCO Method Is a Game-Changer for Low Porosity Hair
If you have low porosity hair, you know the struggle. Products often feel like they’re just sitting on top of your hair, making it greasy instead of moisturized. Your cuticles are shut tight, so the traditional LOC method can easily lead to buildup.
This is where the LCO method comes in. By simply flipping the last two steps, you’re working with your hair’s structure, not against it.
Let's break down the LCO method:
- Liquid: Just like before, you start with a water-based liquid to provide the core hydration.
- Cream: Now for the switch-up. You apply your cream before the oil. A good cream will help soften the cuticle and, since it also contains water, it adds another chance for moisture to get in.
- Oil: The very last step is a lightweight sealing oil. This oil locks in both the liquid and the cream, creating a final, non-greasy seal that won't weigh your hair down or sit on the surface.
For low porosity hair, putting a light oil on last prevents that "product just sitting there" feeling. The cream gets a chance to absorb first, and the oil provides a sleek, effective seal without the heaviness of a thick butter.
This kind of science-backed approach is what has transformed the natural hair care industry, which was valued at a massive USD 10.97 billion in 2023 and is on track to hit USD 19.34 billion by 2032. It’s no surprise, especially when research shows that certain oils, like coconut oil, can actually penetrate the hair fiber and cut down on protein loss by up to 50% more than mineral oils. This is why women, who represent 71.4% of the market, are increasingly turning to routines that are proven to work.
Choosing Your Products for Each Step
Of course, these methods are only as good as the products you use. Picking the right ones for your porosity is crucial. For a deep dive into choosing the right oils, you can learn more about how to choose the right oils, like Jojoba, in our article on its simple, pure benefits.
To get you started, here’s a quick cheat sheet:
| Product Layer | For Low Porosity Hair | For High Porosity Hair |
|---|---|---|
| Liquid (L) | Water, rosewater sprays, very lightweight leave-ins with minimal ingredients. | Water-based leave-in conditioners, aloe vera juice, or hydrating mists. |
| Oil (O) | Lighter oils that absorb easily, like Argan, Grapeseed, or Jojoba Oil. | Heavier sealing oils like Castor, Olive, or Avocado Oil. |
| Cream (C) | Lightweight puddings, hair milks, or styling lotions that won’t cause buildup. | Thicker creams, custards, and butters like Shea Butter or Mango Butter. |
The real secret? Experimentation. Try the method that sounds right for your porosity and stick with it for a few weeks. Pay close attention to how your hair feels and looks. You might even find that a hybrid approach works best for you. At the end of the day, the goal is always to listen to what your unique hair is telling you.
Choosing the Right Natural Oils for Your Hair
Once you've got your layering method down, the next piece of the puzzle is picking the right oils. This is where a lot of people get stuck, but it doesn't have to be complicated. The secret is knowing that oils generally fall into two camps: moisturizing oils and sealing oils.
Picking the right one for your hair's unique personality—especially its porosity—is what separates weighed-down, greasy strands from light, hydrated, bouncy curls. My advice? Stick with single-ingredient, cold-pressed oils. That way, you know you’re getting pure nourishment without any weird fillers.
The Difference Between Penetrating and Sealing Oils
It all comes down to molecular size. Some oils have tiny molecules that can actually slip inside the hair shaft, delivering fatty acids and nutrients from the inside out. Others have bigger molecules that can't get in, so they sit on top and create a protective barrier. This barrier is what locks in all the water and leave-in conditioner you just worked so hard to apply.
- Moisturizing (Penetrating) Oils: Think of these as your hair’s internal nourishment. Oils like Coconut and Argan Oil are small enough to pass through the cuticle, strengthening and hydrating your strands from within.
- Sealing Oils: These are your protectors. This is where oils like Ella & Eden's Jojoba and Castor Oil really shine. They coat the hair strand to stop moisture from escaping, which is a total game-changer for high-porosity hair that loses water easily.
This little visual is a great way to see how your porosity might guide your layering method and, in turn, the type of oil you should reach for.
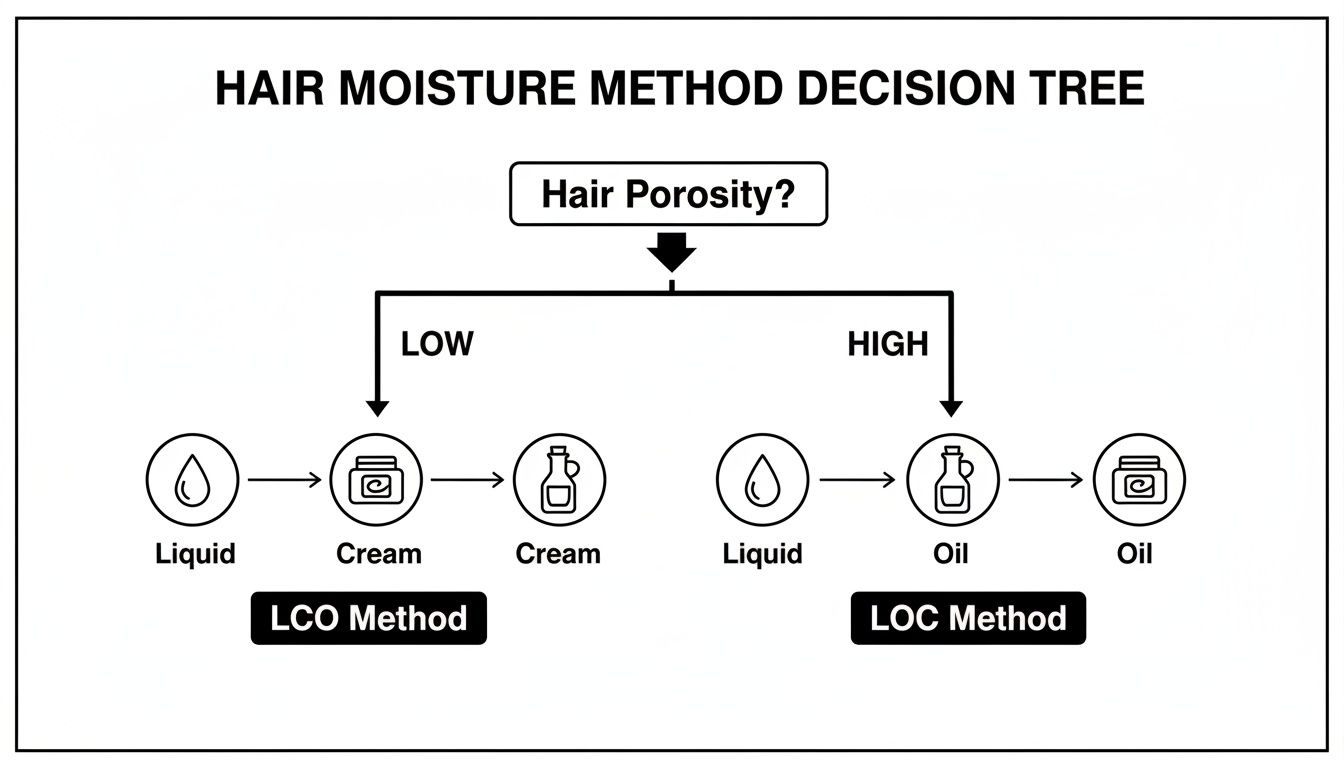
As you can see, low porosity hair often loves the LCO method, where a lighter cream and then a light oil seal everything in. High porosity hair, on the other hand, usually needs the heavy-duty barrier that the LOC method provides.
Your Go-To Oils and How to Use Them
Knowing the theory is one thing, but let's talk about what this looks like in your bathroom. When should you reach for which bottle?
Ella & Eden Organic Argan Oil This is a fantastic all-rounder. Because its molecules are on the smaller side, it can actually get into the hair shaft to boost elasticity and give you a brilliant shine without that heavy, greasy feeling. It's an ideal pick if you have low-to-normal porosity hair and want to tame frizz and add some serious softness.
Ella & Eden Organic Jojoba Oil Jojoba oil is the MVP for scalp health. Why? Its structure is incredibly close to our skin's natural oil (sebum). So if you're dealing with an oily scalp but your ends are perpetually thirsty, jojoba can help bring things back into balance. As a sealant, it’s light enough that it won't weigh down fine hair or low porosity curls.
Ella & Eden Organic Castor Oil When you need the big guns, this is it. Castor oil is the ultimate heavy-duty sealant. Its thick, rich consistency is perfect for coating the ends of high porosity hair, which are always the first to split and break. If you want to learn more, we have a whole guide on the simple but powerful benefits of castor oil.
Pro Tip: Don't feel like you have to marry just one oil! I often use a penetrating oil like Argan as part of a deep conditioning treatment and then grab a sealing oil like Jojoba as the very last step in my styling routine to lock it all in.
There's a reason the natural hair care market is projected to skyrocket from USD 11.67 billion in 2024 to USD 20.59 billion by 2033. With 60-70% of us navigating textured hair dryness, we're all looking for real solutions. Curls can lose moisture up to five times faster than straight hair, and science shows that oils like argan and castor are crucial for giving them what they need. For instance, a quality product like Ella & Eden's Organic Argan Oil can hydrate strands 40% more effectively than some synthetic conditioners, giving curls that bounce-back elasticity they crave.
Building Your Custom Oil Toolkit
Finding the right oils isn't about chasing a single "miracle" product. It's about building a small, effective toolkit that's perfectly matched to what your hair is telling you it needs.
To help you get started, here's a quick guide to some of our favorite oils from Ella & Eden and how they stack up.
Ella & Eden Oil Selection Guide for Natural Hair
| Oil | Primary Benefit | Best For Hair Porosity | How to Use It |
|---|---|---|---|
| Argan Oil | Boosts shine, tames frizz, improves elasticity | Low to Normal | A fantastic finishing oil for shine or mixed into a leave-in treatment |
| Jojoba Oil | Balances scalp oil, provides a lightweight seal | Low to Normal | Perfect for sealing fine hair or for a mid-week moisture refresh |
| Castor Oil | Creates a heavy-duty seal, strengthens ends | High | The ideal 'O' in an LOC/LCO method, especially for thick or coily hair |
By understanding the unique job each oil does, you can finally stop guessing and start building a routine that actually works. The real key to lasting moisture is learning to listen to your hair and giving it exactly what it's asking for—whether that's deep nourishment from within or a protective shield to keep it hydrated for days.
Common Moisturizing Mistakes to Avoid (And How to Fix Them)
Even with the best intentions, it's easy to fall into habits that secretly sabotage all your hard work. If your hair still feels dry no matter what you do, you might be making one of these common mistakes. Let's troubleshoot what might be going wrong so you can get back on track.
One of the biggest culprits is applying products to bone-dry hair. Your hair is like a sponge—it soaks up moisture best when it's already a little damp. Slathering a rich cream or oil onto completely dry strands just creates a greasy film on top. It sits there, unable to penetrate, and actually blocks any real hydration from getting in.
Piling on Heavy Butters and Creams
It’s a natural instinct: if hair is dry, add more product. But when it comes to thick butters and oils, less is often more. Overloading your hair, especially if it’s low porosity, is a one-way ticket to buildup.
This heavy, waxy residue coats the hair shaft so completely that nothing else—not even water—can get in. Over time, your hair starts to feel dull, weighed down, and even drier than before. The key isn't more product, but smarter application. Start with damp hair, use a light leave-in, and then seal with just enough oil or butter to lock it all in.
The natural hair care market is booming, growing from USD 10.17 billion in 2024 to a projected USD 16.99 billion by 2030. It's no surprise that women, making up 71.4% of this market, are leading the charge away from harsh chemicals and toward effective, natural hydration. You can dive deeper into these natural hair market trends on Grand View Research.
Skipping Nighttime Protection
You can nail your daytime moisturizing routine, but if you're sleeping on a cotton pillowcase, you're basically undoing it all overnight. Cotton is incredibly absorbent and literally saps the moisture right out of your hair while you sleep. The constant friction also roughs up your hair cuticles, leading to frizz, tangles, and breakage.
This one is a non-negotiable fix. Protect your hair before you go to bed.
- Satin or Silk Scarf/Bonnet: Wrap your hair up to keep moisture locked in and prevent friction. A bonnet is fantastic for containing everything comfortably.
- The "Pineapple": Loosely gathering your curls at the top of your head with a scrunchie or gentle tie helps preserve your curl definition.
- Satin Pillowcase: If you can’t stand wearing anything on your head, this is the next best thing. It gives your hair a smooth, slippery surface to glide on.
Oiling Your Scalp Instead of Your Strands
Many of us grew up with the advice to "grease the scalp." But here’s the thing: your scalp already produces its own natural oil, sebum. Adding more oil directly to your roots can clog pores, attract dirt, and lead to frustrating buildup.
The real purpose of oils in a modern natural hair routine is to seal the hair strands, especially the ends. Your ends are the oldest, most fragile part of your hair and need the most protection. After you've applied your water-based moisturizer or leave-in, smooth a sealing oil from the mid-lengths down to the tips. This simple step traps that precious hydration right where you need it most, preventing split ends and helping you retain length.
Your Top Hair Moisture Questions, Answered
Figuring out natural hair care can sometimes feel like a puzzle. Just when you think you’ve got it all down, a new question pops up. Let's clear up some of the most common hangups so you can get back to what matters: having healthy, hydrated hair.
Think of this as a quick-reference guide to reinforce everything we've talked about. These are the practical, real-world answers you need to keep your curls thriving.
How Often Should I Moisturize My Natural Hair?
Honestly, there’s no universal schedule. How often you need to moisturize is a personal conversation between you and your hair.
Your hair's porosity, texture, and even the weather where you live are all part of the equation. For instance, high porosity hair gets thirsty fast and might need a daily spritz of water and a quick seal. On the other hand, low porosity hair is great at holding onto moisture and might feel fantastic for two to four days after a solid wash day routine.
The best way to know? Just touch it. If your hair is starting to feel dry, stiff, or a little crunchy, it’s asking for a drink.
- Your Baseline: Start with a deep moisturizing session on wash day, using your preferred layering method (LCO or LOC).
- The Mid-Week Refresh: A few days later, see how it feels. If it's losing that soft, hydrated feeling, lightly mist it with water or a hydrating spray. Follow up with a tiny bit of a lightweight oil, focusing on your ends to seal it all in.
Can I Moisturize My Hair Without Washing It First?
Yes, absolutely! In fact, you should be. Moisturizing between wash days is essential for keeping your hair flexible and preventing breakage. The biggest thing to remember is that water is the actual moisturizer. You don't need a full-on shampoo session every time your hair feels a bit parched.
There's one major catch, though: product buildup. If your hair is already coated in days of old creams, gels, and butters, slathering on more product is a waste of time. The fresh moisturizer can't get past that barrier, leaving your hair feeling greasy, dull, and weighed down.
Ever spritz your hair with water and see the droplets just sit on top, like rain on a freshly waxed car? That's the classic sign of product buildup. Your hair is telling you it needs a deep clean before it can drink anything else up.
When this happens, a gentle co-wash or even a clarifying shampoo is what you need to hit the reset button. Once that buildup is gone, your hair will be ready to properly absorb all the goodness you give it.
Why Does My Hair Still Feel Dry After I Moisturize?
This is easily one of the most frustrating feelings, but don't worry—the answer is usually pretty simple. It almost always boils down to one of three common culprits.
- A Porosity Mismatch: You might be using products that are working against your hair's natural structure. Slathering a heavy castor oil and shea butter cream on low porosity hair, for example, will just create a greasy coating while the hair shaft underneath stays bone dry.
- Skipping the Water Step: This is the big one. So many people think oils and butters are moisturizers, but they're not—they're sealants. If you apply a sealing oil to dry hair, you're just locking the dryness in. Always, always make sure your hair is at least damp with water or a water-based leave-in before you seal.
- The Buildup Barrier: We just talked about this, but it’s worth repeating. If your hair cuticles are clogged with old product, nothing new can penetrate. A monthly clarifying session can be a total game-changer, stripping away that residue so your moisturizers can finally do their job.
Pinpointing which of these is your issue is the key to finally solving the mystery of chronically dry hair.
Ready to build your perfect moisture-sealing toolkit? At Ella & Eden, we offer a curated selection of single-ingredient, cold-pressed oils like Argan, Jojoba, and Castor to help you lock in hydration the clean and simple way. Discover pure, effective essentials for your routine at https://www.ellaandeden.com.