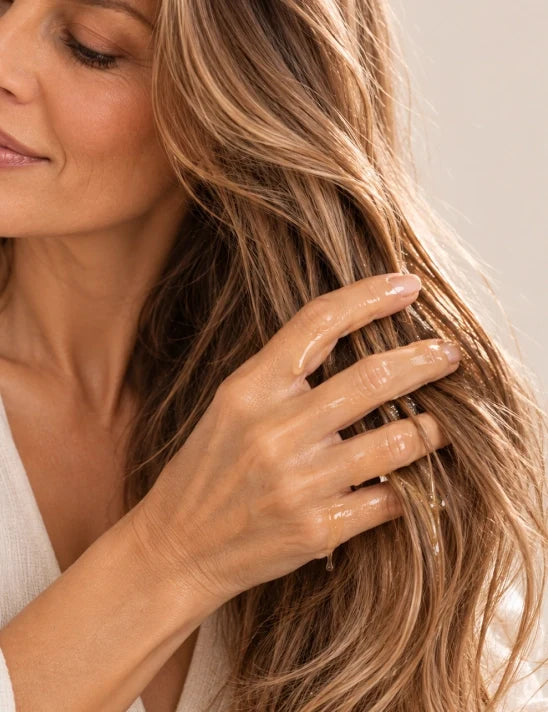
Hot Oil Treatment with Castor Oil: A Practical Guide
The most popular advice about a hot oil treatment with castor oil is also the least reliable: that warming the oil will make hair grow faster. It won't. Castor oil has a long history in hair care, but modern reviews find no strong evidence that castor oil alone stimulates hair growth or treats hair loss. Its practical value is more grounded and more useful: it can add temporary sheen, improve slip, soften dry-feeling lengths, and make detangling less punishing.
That distinction matters. If you're dealing with progressive thinning, bald patches, scalp pain, pustules, or persistent scaling, an oil treatment isn't a substitute for medical evaluation. If your goal is better-feeling hair and a soothing pre-shampoo ritual, castor oil can earn a place in your routine, provided you dilute it, warm it gently, and wash it out thoroughly.
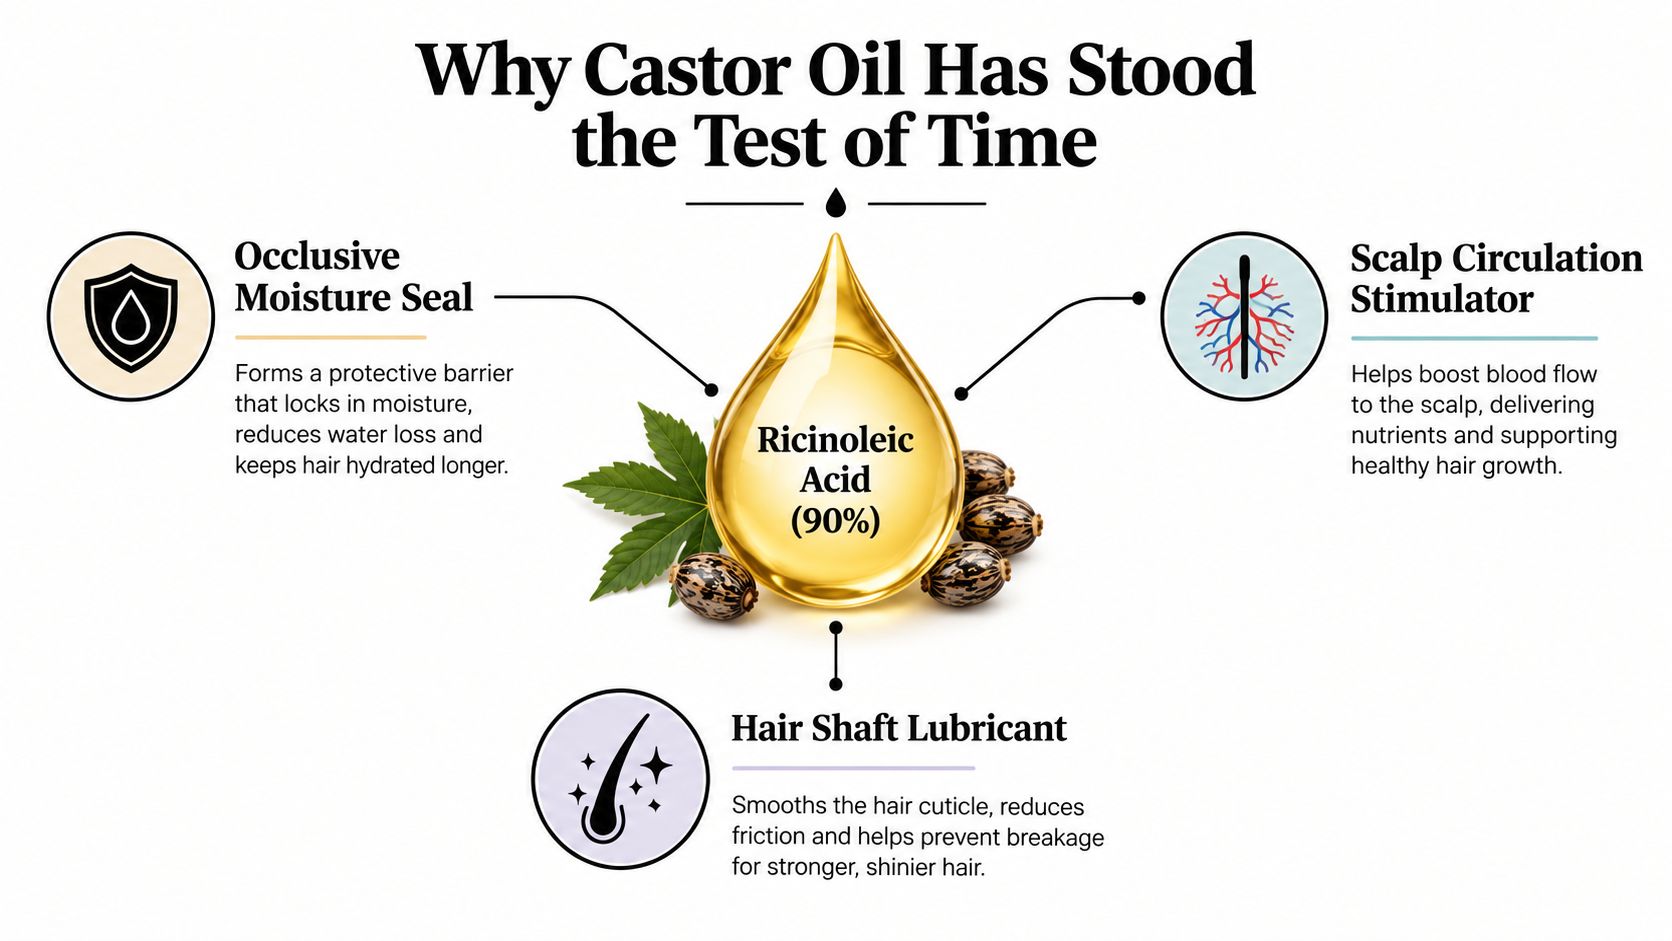
Why Castor Oil Has Stood the Test of Time
Castor oil's long history does not make it a hair-growth treatment. Records connect its hair-care use with ancient Egypt, including references dating to 4000 BC and Egyptian records around 1550 BCE involving alopecia and thinning hair (Journal of Drugs in Dermatology review via PubMed). That history explains its staying power in scalp rituals. It does not show that castor oil changes follicle activity.
Its reliable role is cosmetic. Castor oil is dense and highly occlusive, allowing it to leave a film over the hair fiber. Used before shampooing, that coating can reduce a rough feel, add shine, and improve the glide between strands during combing. Lower friction can make fragile, dry hair easier to handle.
Easier detangling isn't the same as new growth.
What the evidence supports
The dermatology literature supports a narrow claim: castor oil may improve luster and the feel of conditioned hair. A narrative review likewise places its practical value in cosmetic conditioning and shine, rather than follicle stimulation. Claims that pure castor oil promotes hair growth or treats infestation go beyond that evidence.
Use it as a conditioning ritual, not a regrowth treatment. A randomized trial of a rosemary-castor blend reported improvements in hair growth rate, thickness, density, and length over 90 days, but the formula contained rosemary and did not isolate castor oil's effect. That result cannot establish that pure castor oil regrows hair.
My recommendation: Judge the treatment by softness, shine, slip, and easier wash-day handling. For unexplained hair loss, choose medical assessment instead of an oil routine.
Castor oil suits parched, coarse, curly, or porous lengths that benefit from a temporary protective coating. Fine or low-porosity hair can feel coated quickly, especially with undiluted oil. Start with a small amount, keep the treatment temporary, and patch test before applying the blend across your scalp.
Choosing and Warming Your Castor Oil Safely
Choose a cold-pressed, hexane-free castor oil labeled for cosmetic use. A simple ingredient list is easier to assess than a heavily fragranced blend, particularly if your scalp reacts to essential oils or botanical additives. Jamaican black castor oil is a different preparation and may feel harsher for some users, so it isn't automatically the better choice.
Castor oil's viscosity is the main formulation challenge. It spreads slowly, clings to the fiber, and can be difficult to remove when used heavily. Diluting it with jojoba or grapeseed oil improves distribution and gives you more control over the final feel. You can also review this guide to choosing castor oil for hair before deciding whether a single oil or a diluted blend suits your strands.
Starting dilution points
| Hair Type | Castor Oil | Lighter Carrier Oil | Starting Notes |
|---|---|---|---|
| Fine or easily weighed-down | 1 part | 2 to 4 parts | Keep the blend light and use a small amount |
| Medium, curly, or wavy | 1 part | 1 to 2 parts | Adjust according to slip and residue |
| Coarse or highly porous | 1 to 2 parts | 1 part | Richer blends may suit thirsty lengths |
| Sensitive or buildup-prone scalp | 1 part | 2 parts | Apply sparingly and prioritize the lengths |
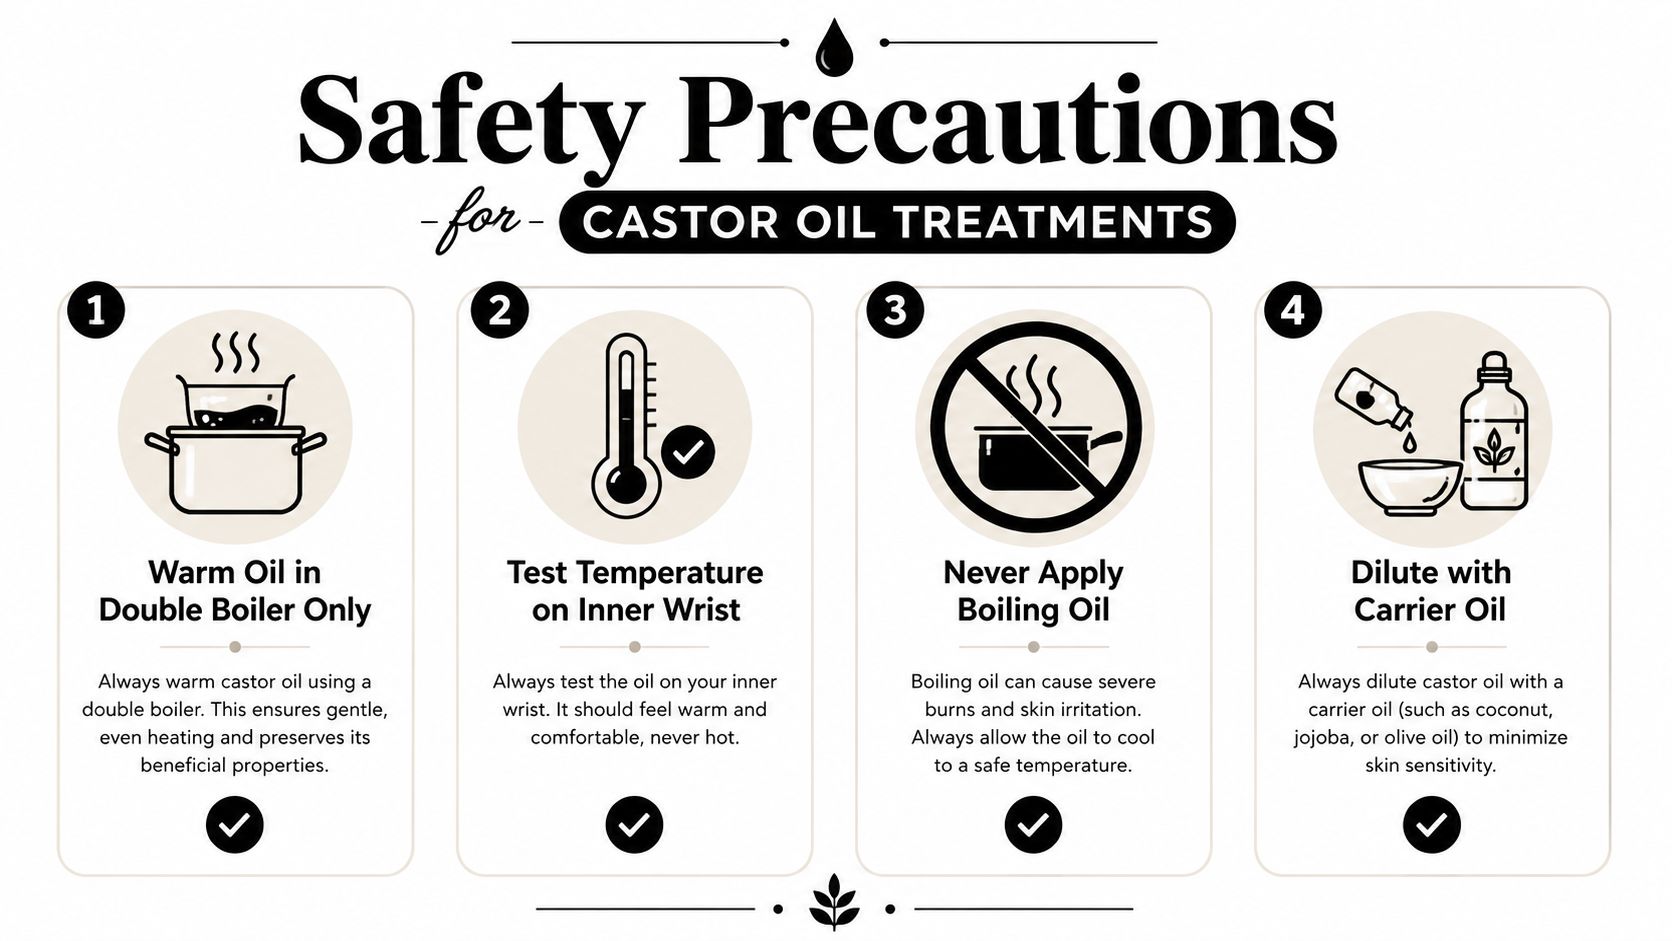
Warm only the amount you'll use. Pour the blend into a heat-safe bowl or bottle, then place it in a larger bowl of warm water. Stir it until the temperature feels even. Never microwave castor oil and never heat it directly in a pan, because hot spots can form before the rest of the blend feels warm.
Test a drop on the inner wrist. The correct temperature is comfortable to the touch, never hot. Add essential oil only if you already know your scalp tolerates it, and calculate the amount against the entire blend. For a sensitive scalp, children, pregnancy-related caution, or a minimalist routine, skip essential oils altogether.
How to Apply a Castor Oil Hot Oil Treatment
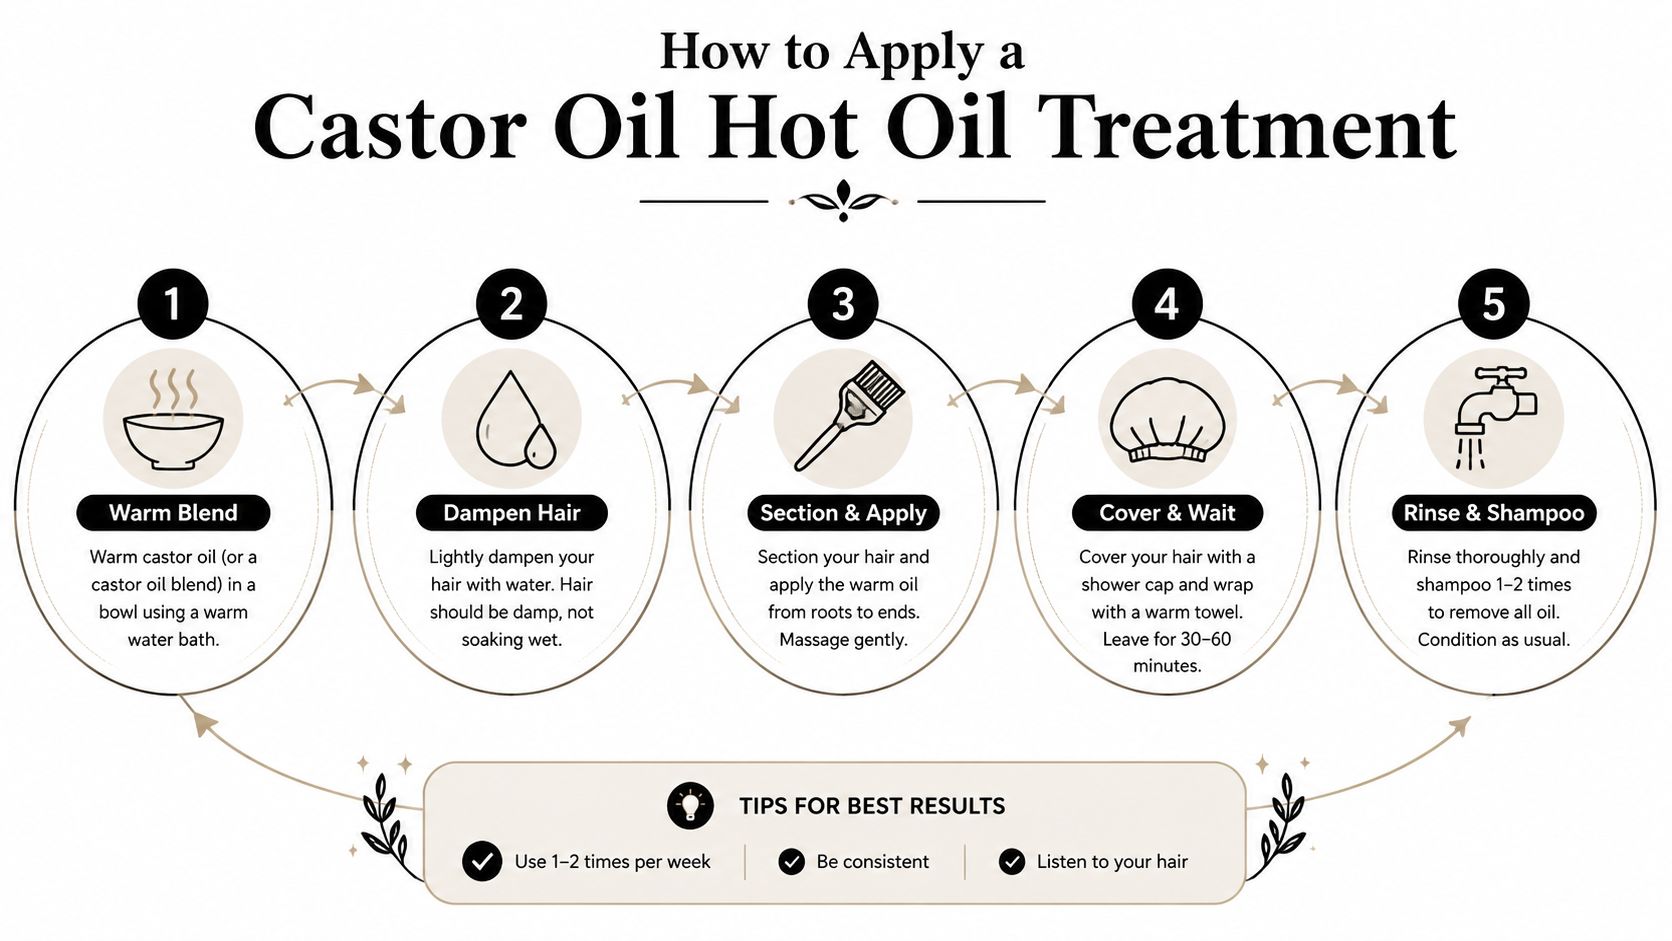
Treat this as a pre-shampoo service, not an overnight soak. Start with clean or recently detangled hair and lightly dampen it. Hair that's dripping wet can dilute the blend and make even coverage harder, while dry, tangled hair creates unnecessary pulling before the oil has had a chance to improve slip.
Use a wide-tooth comb from the ends upward. If the hair catches, add a small amount of leave-in conditioner rather than forcing the comb through. Divide the hair into workable sections, usually four to six depending on density, and clip each section away from the others.
Build the application slowly
Put a small amount of the warm blend on gloved fingertips. Press it into the scalp section by section instead of pouring it directly over the head. Use broad, slow fingertip movements for one to two minutes, with light pressure. Aggressive scratching won't improve the treatment and can aggravate already irritated skin.
If you want more detail on the massage portion, follow this scalp massage guide for hair growth, while keeping expectations realistic about what massage and oil can accomplish. The massage may feel relaxing, but the oil itself hasn't been shown to meaningfully alter the hair-growth cycle.
Once the scalp has a light coating, smooth the remaining blend over the mid-lengths and ends. Don't saturate the hair just because more product feels more nourishing. Long hair can be twisted or loosely braided to reduce tangling, then covered with a plastic cap.
Keep the treatment on for 15 to 30 minutes. Very dry, coarse hair may tolerate up to 45 minutes if the scalp remains comfortable, but sleeping in castor oil is a poor routine choice because it increases the chance of residue, transfer, and tangling. Rinse with lukewarm water, apply shampoo directly to the scalp, emulsify with your fingertips, and rinse thoroughly. Thick hair or a heavy application may need a second shampoo.
Finish with conditioner, concentrating it where the hair feels dry. Detangle while the conditioner is present, rinse well, and let the hair dry as usual. If the hair still feels coated, cleanse again before adding more oil at the next wash.
Adapting the Treatment for Different Hair Types
One formula can behave completely differently on fine waves and dense coils. The right adjustment isn't about forcing every hair type into the same routine. It's about watching how quickly the hair becomes coated, how long it stays soft after washing, and whether the scalp feels calm afterward.
| Hair Type | Dilution (Castor:Carrier) | Temperature | Leave-In Time | Frequency |
|---|---|---|---|---|
| Fine or limp-prone | 1:2 to 1:4 | Lukewarm | 15 to 20 minutes | Use sparingly |
| Wavy | 1:2 | Lukewarm | 15 to 25 minutes | Adjust to residue |
| Curly | 1:1 to 1:2 | Warm but comfortable | 20 to 30 minutes | Use around wash days |
| Coily or highly porous | 1:1 to 2:1 | Warm but comfortable | 30 to 45 minutes | Increase only if buildup stays low |
| Color-treated | 1:2 | Cooler warm | 15 to 25 minutes | Keep the application light |
| Low-porosity | 1:2 to 1:4 | Moderately warm, never hot | 15 to 25 minutes | Prioritize lighter blends |
Fine hair usually needs less oil and less contact time. A richer castor blend can flatten the root area and leave the lengths looking dull rather than glossy. Apply mostly from the mid-lengths down if your scalp becomes oily quickly.
Curly and coily hair often benefits from extra slip during detangling, but density can tempt you to overapply. Work in sections and coat the surface lightly instead of trying to soak every strand. Highly porous or chemically processed hair may accept a richer blend, but softness after washing is the test, not the amount of oil used.
Low-porosity hair can respond better to a gently warmed blend and a cap that holds mild warmth. Keep the treatment short at first. Color-treated hair deserves a cooler application and careful cleansing, because aggressive washing can leave the fiber feeling dry and may affect fragile color.
Troubleshooting Common Castor Oil Treatment Mistakes
The usual failure looks like this: you rinse, shampoo once, and your hair still feels greasy and heavy. The roots look dull, the curls won't spring back, and the castor oil seems to have become part of the hairstyle. That result usually points to too much product, too much time, or inadequate cleansing, not proof that your hair can't tolerate every oil treatment.
Read the residue before changing everything
Start with the amount applied. If your hair feels coated before shampooing, the treatment was already too heavy. The next time, reduce the total volume and use more carrier oil rather than adding another layer of castor oil. For fine or low-porosity strands, a lighter dilution is the sensible first correction.
Then consider the temperature and timing. Oil that was heated directly or applied too hot creates a burn risk and may leave the scalp uncomfortable. Long contact time also gives a heavy formula more opportunity to accumulate around the roots and hairline. Return to the comfortable-to-the-touch rule and shorten the session.
Wash-day diagnosis: If the hair is greasy, don't add conditioner to solve it. Remove the residue first, then restore softness.
For removal, use lukewarm water and apply shampoo directly to the oiled areas. A first cleanse loosens the film, while a second cleanse can remove what remains. If buildup persists, use a clarifying shampoo occasionally, then follow with conditioner on the lengths. Don't scrub the scalp with nails.
A warm apple cider vinegar rinse can be used as a final rinse if it's already part of your routine and your scalp tolerates it, but it won't rescue a treatment overloaded with oil. If the scalp stings, itches, develops redness, or forms bumps, stop oiling and don't try to mask the reaction with another rinse.
Safety Precautions and Risks You Should Know
Natural ingredients still have safety limits. Direct stovetop heating can push castor oil beyond a comfortable skin-contact temperature, and a scalp burn can happen before you realize the blend is too hot. Warm water bathing gives you better control because the surrounding water moderates the heat.
Use a heat-safe bowl, warm water, and an inner-wrist test every time. Never pour boiling oil onto the scalp. Dilute the castor oil before warming it, and keep the application light around the hairline, ears, and any area that already feels irritated.
The risks most guides leave out
Acute hair felting is a documented complication associated with castor oil use. Hair fibers can compact into severe matting, and the resulting felting may be irreversible and require cutting the affected hair. This is one reason I don't recommend sleeping in undiluted castor oil or applying a large amount to fragile, wet, tightly textured hair.
Avoid applying the treatment over an active scalp condition. Painful bumps, open skin, intense redness, heavy scaling, or sudden shedding need professional assessment rather than more oil. Castor oil may also leave a film that complicates the timing or absorption of leave-on scalp products, including prescription treatments. Ask your clinician how to space oiling from products such as minoxidil or tretinoin instead of layering them together.
Before full application, perform a small patch test and follow this patch-testing guide for skincare. A patch test can't predict every scalp reaction, but it's a sensible screening step. Stop immediately if you experience burning, swelling, hives, or persistent itching.
Making Hot Oil Treatments a Sustainable Ritual
A sustainable routine uses less product, not more. Warm only what you need for one session, keep the blend in a reusable glass jar, and wash the bowl and applicator promptly. There's no need to microwave oil or buy a complicated collection of tools. A small bottle can support repeated treatments when you apply a thin, controlled layer.
Pair the ritual with an existing shampoo day so it doesn't become another demanding task. Use a lighter blend when your hair is behaving well, and reserve a richer mixture for periods when the lengths feel unusually rough or tangle easily. Your scalp's comfort should determine whether the routine continues, not a promise of overnight transformation.
A simple note in your phone can reveal what works. Record the blend, how the hair felt before washing, whether you needed one or two cleanses, and how easily you detangled afterward. If the hair feels limp, reduce the castor oil or shorten the contact time. If the ends still feel rough but the scalp is clean, keep the treatment focused below the roots.
The useful result is measurable by touch: more slip, less roughness, easier detangling, and temporary shine.
Give the routine enough consistency to evaluate those cosmetic outcomes, but don't use it to postpone care for ongoing thinning or scalp symptoms. The evidence supports conditioning and luster more than follicle stimulation, so judge the ritual by hair-fiber behavior rather than by a hoped-for growth claim.
Ella & Eden offers simple, multi-purpose oils for hair and self-care, including castor oil suited to scalp massage and pre-shampoo conditioning rituals. Visit Ella & Eden to explore ingredient-focused hair-care options and choose a straightforward formula for your warm-oil routine.