DIY Hot Oil Treatment for Hair: A Complete Guide
Some nights, your hair tells the whole story before you do. The ends feel rough. The crown looks flat or frizzy, depending on the weather. You smooth a little serum over it, tie it back, and promise yourself you’ll deal with it properly later.
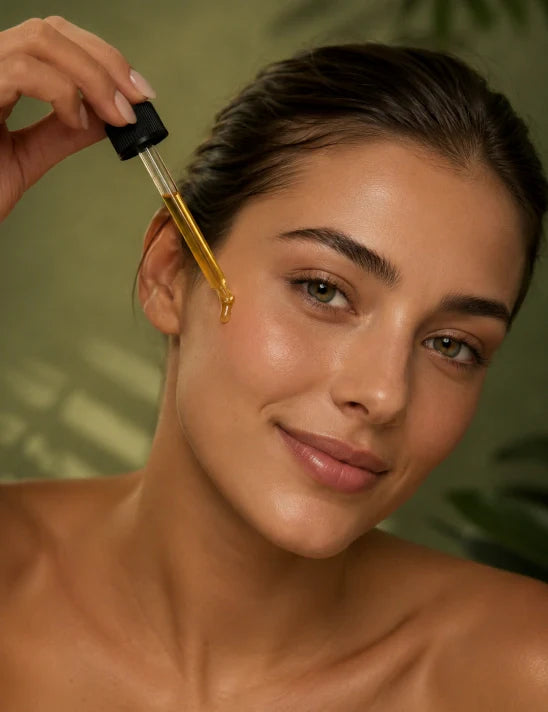
A diy hot oil treatment for hair is one of the few rituals that feels both useful and calming. It doesn’t ask for a drawer full of products or a complicated routine. You warm a simple oil, slow down for a moment, massage your scalp, and let heat and time do what rushed styling can’t.
The Transformative Power of a Hot Oil Treatment
Dry hair rarely needs more fuss. It usually needs less manipulation and better nourishment. That’s why hot oil treatments have stayed relevant for so long. They’re simple, tactile, and effective in a way that many quick-fix products aren’t.
When oil is warmed gently, it spreads more easily through the hair and sits less heavily on the surface. That matters if your hair feels brittle, dull, fluffy at the ends, or overworked from color and heat. Instead of just coating the outside, the treatment supports softness, flexibility, and shine in a deeper way.

Why this ritual works
The strongest place to start is coconut oil. It’s the most researched plant-based oil for this use, and its low molecular weight helps it penetrate the hair shaft, reducing protein loss by up to 60% according to dermatological reviews cited by Prevention’s guide to hot oil treatment for hair. That one detail explains why a good hot oil treatment can make hair feel less fragile after rinsing, not just temporarily slick.
A treatment like this also changes the mood of hair care. Instead of fighting your hair into submission, you work with it. You soften it first. You give the scalp a few quiet minutes of attention. You create slip before wash day instead of trying to rescue stressed strands after the fact.
Practical rule: If your hair snaps, tangles easily, or feels rough when wet, think nourishment first and styling second.
More than repair
There’s also a self-care reason people stick with this ritual. A warm bowl, a clean towel, a shower cap, a patient scalp massage. It turns basic maintenance into something grounding. That matters because consistency is easier when a routine feels good, not clinical.
For readers also focused on fullness, shedding, or overall strand health, I’d pair this ritual mindset with a broader look at how to get thicker hair. Thickness usually comes from several habits working together, and a hot oil treatment fits beautifully into that bigger picture.
What works best is treating this as supportive care, not a miracle. One session can leave hair softer and more manageable. Repeated, thoughtful use is where you usually notice fewer rough ends, better shine, and less resistance when you detangle.
Choosing Your Perfect Oil Blend
Not every oil behaves the same way on hair. Some sink in quickly. Some sit closer to the surface and help coat the strand. Some feel balancing on the scalp, while others are better saved for the lengths and ends. The right blend depends less on trends and more on what your hair is asking for today.
If you only remember one principle, make it this: match the oil texture and purpose to your concern. A fine, easily weighed-down hair type often wants a lighter touch. Coily, thirsty, or heavily processed hair usually tolerates richer oils much better.
How the core oils compare
Coconut oil is the classic choice when the goal is reducing that dry, weakened feeling. It has a direct, strengthening reputation and gives many people that “my hair feels more solid” result after rinsing.
Jojoba oil is useful when your scalp gets oily fast or feels reactive. It has a balanced feel rather than a heavy, blanketing one, so it works well for people who want softness without a greasy finish.
Argan oil is the oil I reach for when hair looks puffy, dull, or weather-struck. It brings shine and smoothness and is especially helpful when your lengths look tired even after styling.
Castor oil is much thicker. It isn’t the oil to pour on carelessly, but in a small amount it’s excellent in a blend for scalp-focused rituals or weak-feeling ends. Castor oil stimulates scalp circulation, while rosemary oil was shown in a 2015 clinical trial to rival minoxidil 2% for hair growth. That makes the castor and rosemary pairing especially relevant when thinning or scalp support is part of the goal.
Rosemary oil is different from the others because it isn’t a carrier oil. It’s potent and should be diluted into a base oil. Think of it as a focused add-on for scalp rituals, not the whole treatment by itself.
Ella & Eden Oil Guide for Your Hair Type
| Hair Concern / Goal | Recommended Ella & Eden Oil | Primary Benefit |
|---|---|---|
| Dry, brittle lengths | Organic Coconut Oil | Supports softness and helps reduce the rough, weak feel |
| Frizz and dullness | Argan Oil | Smooths the surface and adds shine |
| Oily or easily irritated scalp | Jojoba Oil | Feels balancing and lightweight on the scalp |
| Thinning concerns | Castor Oil with diluted Rosemary Oil | Supports a scalp-focused massage ritual |
| Thick, coarse, textured hair | Castor Oil blended with Jojoba or Argan | Adds richness while improving spreadability |
| Minimalist all-round use | Jojoba Oil | Versatile option for scalp and lengths |
Blending with intention
A good blend usually has a clear job. If your hair is breaking at the ends, don’t overload the scalp with heavy oil and ignore the damaged part. If your scalp feels tense or dry, don’t put all your product on the mid-lengths and hope for the best.
A few simple pairings work well:
- For softness and strength: Coconut with a little argan.
- For scalp balance: Jojoba as the base, with a small addition of castor if you want more richness.
- For growth-focused routines: Castor as a small part of the blend, plus properly diluted rosemary.
- For shine without heaviness: Argan with jojoba.
Your blend should feel easy to spread. If it feels sticky, ropey, or hard to distribute, it’s too heavy for a relaxing ritual and probably too heavy for your rinse-out step too.
If you want a deeper ingredient-by-ingredient comparison, Ella & Eden has a helpful guide to the best carrier oils for hair. It’s a useful reference when you’re deciding whether your hair needs coating, softening, scalp balance, or a mix of all three.
What works and what doesn’t
What works is starting with single-ingredient oils so you can tell what your hair likes. What doesn’t work is throwing five rich oils together, adding too many extras, and then wondering why your roots feel coated for two days.
Keep the ritual customizable, but keep it clean. Hair usually responds better when you know exactly what you put on it.
Your Step-by-Step DIY Hot Oil Ritual
Technique matters more than people think. The difference between “my hair feels nourished” and “why won’t this rinse out?” often comes down to temperature, amount, and where you place the oil. A diy hot oil treatment for hair should feel deliberate, not messy.

Prepare your hair and oil
Start with clean, damp hair. That one choice changes the whole result. Damp hair helps the oil spread more evenly, and clean hair gives the treatment a better chance of reaching the strand instead of sitting on top of old product buildup.
Choose your oil or blend, then pour out only what you expect to use. The amount depends on your hair length and density, but the goal is a light, even coating, not saturation to the point of dripping.
To warm it, use either of these methods:
- Microwave method: Warm briefly in short bursts.
- Double-boiler method: Set the oil container over warm water and heat gently.
- Safety check: Always test the oil on your wrist before it goes anywhere near your scalp.
The ideal temperature range is 100 to 110°F (38 to 43°C), according to Healthline’s hot oil treatment guidance. Warm is enough. Hot is a mistake.
Section before you apply
Divide your hair into manageable parts. Four sections work well for many people, but more sections can help if your hair is dense, long, or textured. This keeps the ritual calm and prevents you from overpouring oil into one area while missing another.
I prefer to apply with fingertips first and use the palms to smooth the lengths. An applicator bottle can help, but hands give you better feedback. You can feel immediately whether a section is coated properly or drowning.
Warm oil should make your hair feel cushioned, not soaked.
The art of application and massage
Apply the oil to the scalp in small amounts if your treatment is scalp-focused. If your main concern is dryness or breakage, start mid-length and pull the oil downward to the ends, then use whatever remains on your hands around the hairline and crown.
Massage matters. A proper scalp massage isn’t rushed fingertip scratching. It’s a slow circular motion using the pads of the fingers, with enough pressure to move the scalp slightly without dragging the hair.
Healthline notes that massaging the scalp for 5 minutes can boost microcirculation by up to 30%, which is part of why this step feels both soothing and useful in a growth-supportive routine. Because of this, a hot oil treatment stops being just a product application and becomes a ritual.
A practical sequence helps:
- Roots first if scalp care is your priority
- Mid-lengths next if your hair feels rough or puffy
- Ends last, with extra attention if they’re splitting or tangling
- Use your palms to press, not rake, the oil into delicate areas
Create a warm environment
Once the oil is in place, cover your hair with a shower cap. Then wrap a warm towel over it or use a heat cap if that’s part of your routine. Gentle trapped warmth helps the treatment feel more cocooning and improves the way the oil settles into the hair.
According to the same Healthline guidance, covering with a heat cap can enhance penetration by 2x through thermal activation. That doesn’t mean blasting your hair with aggressive heat. It means creating a soft, warm environment that supports the treatment.
Leave it on long enough to be worthwhile, but not so long that the ritual becomes inconvenient and gets skipped next time. A quiet pause works well here. Tea, a bath, reading, or sitting still for a while turns maintenance into recovery.
Rinse without residue
This is the part that determines whether you’ll want to repeat the ritual. Don’t rush from cap to shampoo in a panic. Start by rinsing with warm water so the oil loosens first.
Then shampoo thoroughly. If your blend was rich, shampoo again before conditioning. Focus the shampoo at the roots and let the lather move downward rather than scrubbing the ends aggressively.
Use this rinse-out sequence:
- Rinse warm first: Loosen the oil before adding cleanser.
- Shampoo at the scalp: That’s where buildup tends to linger.
- Repeat if needed: Especially after castor-heavy blends.
- Condition after: This restores slip and leaves the hair easier to detangle.
Small details that improve the whole ritual
Set out your towel, clips, shower cap, and shampoo before you start. Put on an old tee or robe. Keep a wide-tooth comb nearby if your hair tangles easily, but don’t force it through oil-heavy strands.
If the treatment feels stressful, it won’t become consistent. The best diy hot oil treatment for hair is one you can repeat without dread. Keep it neat, warm, and easy enough to fit into real life.
Pro Tips for Maximum Results
A good result doesn’t come from using the richest oil or leaving it on forever. It comes from timing, restraint, and knowing what problem you’re trying to solve. Most first attempts go wrong in predictable ways.

The biggest mistakes to avoid
According to Mountain Rose Herbs’ hot oil treatment article, common pitfalls affect 30 to 50% of first-time users, including using too much oil. They note that 45% report greasy fallout, and they also flag inconsistent application and overheating as common reasons the ritual disappoints.
That lines up with what I see most often. People assume more oil means more nourishment. Usually, more oil means harder rinsing, flat roots, and frustration.
Watch for this sign: If your hair still feels coated after shampoo, the problem usually wasn’t the ritual. It was the amount.
Adjust the ritual to your goal
Not every session needs to be the same. If your scalp feels neglected, direct more attention there with a lighter hand on the lengths. If your ends feel frayed, use the oil like a deep pre-wash for the lower half of the hair and keep the scalp minimal.
Many women find success with a simple product format instead of mixing from scratch every time. One option is Ella & Eden Hair Growth Oil, which is used as a scalp and hair treatment oil with ingredients such as rosemary, castor, jojoba, peppermint, tea tree, biotin, and vitamin E. It’s one route if you want a ready-made blend, but a simple custom mix with single oils also works well when you want more control.
Frequency and consistency
Your ideal rhythm depends on how your hair behaves after washing. Dry, textured, or over-processed hair often likes a regular ritual. Fine hair or hair that gets oily quickly usually needs a lighter schedule and lighter oils.
A few practical cues help more than rigid rules:
- If your ends feel crisp by midweek: Increase your focus on lengths.
- If your roots collapse after the treatment: Use less oil and choose a lighter base.
- If you never notice a difference: Recheck your consistency, your rinse-out, and whether the oil matches your actual concern.
- If your scalp is sensitive: Keep the blend simple and patch test first.
Cold-pressed oils also make a difference in how pure and straightforward the ritual feels. If you want to understand what that means in practical terms, read Ella & Eden’s guide on what cold-pressed oil is. It helps when you’re trying to avoid fillers and keep your routine minimal.
Support the ritual from the inside too
A hot oil treatment helps the outside of the hair and scalp. It doesn’t replace broader support like nutrition, gentle styling habits, or stress management. If you’re taking a whole-routine approach, some people also like to pair topical care with supplements such as Hair Skin Nails Gummies as part of a wider wellness routine.
The strongest results usually come from that combination of habits. Gentle wash days, less heat, patient detangling, and a hot oil ritual that fits your actual hair, not someone else’s.
Quick Recipes for Targeted Hair Concerns
Sometimes the easiest way to start is with a recipe you can mix in under a minute. These blends keep the ritual focused and remove the guesswork. Use them as rinse-out treatments on clean, damp hair.

For a scalp-focused growth ritual
Use this when your main priority is caring for the scalp and giving your roots more attention.
- 1 tablespoon jojoba oil
- 1 teaspoon castor oil
- A few drops of rosemary oil, properly diluted into the carrier oils
Warm gently, apply mostly to the scalp, and massage slowly with the pads of your fingers. Pull a small amount through the lengths only if your hair needs it.
This blend works because jojoba keeps the texture more manageable, while castor adds richness. Rosemary gives the ritual a more targeted scalp feel without making the whole mixture too heavy.
Keep essential oils restrained. A scalp ritual should feel soothing, not tingly to the point of discomfort.
For intense hydration and shine
This is the blend I’d use when hair feels fluffy, rough, or hard to smooth after washing.
- 1 tablespoon argan oil
- 1 tablespoon jojoba oil
Warm the mixture, smooth it through the mid-lengths and ends, then use what’s left on your palms near the crown and hairline. Cover and let it sit before rinsing and shampooing thoroughly.
Argan gives a polished finish. Jojoba keeps the blend from feeling too rich. Together they make hair feel softer and more cooperative without the thick residue that some heavier oils can leave behind.
For an itchy or uneasy scalp
When the scalp feels unsettled, simplify the ritual instead of adding more ingredients.
- 1 to 2 tablespoons jojoba oil
That’s it. Warm it slightly and apply it with a calm, gentle massage. The point here isn’t to overwhelm the scalp. It’s to give it a quiet, balanced treatment.
For hair that’s also damaged, you can keep this scalp blend separate and use a richer oil only on the ends. If your lengths need extra support, Ella & Eden shares practical ideas in its guide on how to fix damaged hair naturally.
A few mixing notes that matter
Use a small glass bowl or bottle. Mix only what you need for that session. If you’re experimenting, change one variable at a time so you can tell what helped.
The best recipe is the one that leaves your hair easier to rinse, easier to detangle, and nicer to live with the next day. If a blend looks luxurious but behaves like glue, it isn’t the right fit for your routine.
Frequently Asked Questions about Hot Oil Treatments
Can I leave a hot oil treatment on overnight
You can, but that doesn’t mean you should. Overnight use increases the chances of oil transferring onto your pillow, collecting at the scalp, and feeling difficult to wash out in the morning. A shorter, intentional session is enough and is much easier to repeat consistently.
Is a hot oil treatment good for color-treated hair
Yes, it can be a very supportive ritual for color-treated hair, especially when the lengths feel dry or overworked. The key is choosing a simple oil, warming it gently, and rinsing thoroughly without aggressive scrubbing. Keep the focus on softness and manageability rather than piling on heavy product.
Should I apply it to dirty hair or freshly washed hair
Freshly washed, damp hair is the better choice. Dirty hair often has product, sweat, and scalp oils already sitting there, which can make your treatment feel like it’s just coating buildup. Clean hair gives the ritual a cleaner result and usually makes rinsing easier.
What if my hair feels greasy after
That usually means you used too much oil, picked a blend that was too heavy, or didn’t shampoo thoroughly enough. Start with less next time, especially near the roots. You can always add more, but you can’t make an overloaded application easier once it’s already on your head.
Is a hot oil treatment the same as a deep conditioner
Not quite. A hot oil treatment is an oil-based ritual that focuses on softness, lubrication, scalp massage, and helping dry hair feel more supple. A deep conditioner is usually a water-based conditioning product designed to add slip and manageability in a different way. Many people use both, but for different reasons.
Can fine hair use hot oil treatments
Yes, but fine hair usually needs a lighter hand and a lighter oil. Jojoba or a jojoba-argan blend tends to be easier for fine hair than a castor-heavy mix. Keep the amount modest and concentrate more on the lengths than the scalp if your roots get flat quickly.
How often should I do a diy hot oil treatment for hair
Let your hair answer that. If it stays soft and balanced for a while, space the ritual out. If your ends go rough quickly or your hair is heavily processed, you may want a more regular rhythm. The right frequency is the one that improves your hair without creating buildup or making wash day harder.
If you want to build a cleaner, simpler ritual around pure oils, Ella & Eden offers single-ingredient options that make it easier to customize your routine for scalp care, shine, softness, or growth support without unnecessary fillers.